今回は .NET 6でASP.NET Coreに追加された新機能「Minimal API」を使用してSQL Serverからデータを取得する方法ついてお届けします。
本記事では .NET 6でASP.NET Coreに追加された新機能「Minimal API」とEntity Framework Coreを使用してSQL Serverのデータベースへ接続してデータを取得する方法を確認してみます。
目次
Minimal APIとは?
Minimal APIは .NET 6で追加されたASP.NET Coreでの新しいWeb APIの実装方法です。
従来のASP.NET Core Web APIではコントローラー(ControllerBaseから派生したクラス)を使用してエンドポイントへのルーティングを設定しHTTPリクエストを処理していました。
それに比べるとMinimal APIではシンプルなコードでHTTPリクエストを処理できるようになっています。
以下がMinimal APIでHTTPリクエスト(GET、POST、PUT、DELETE)を処理するWeb APIのコードの例になります。
var builder = WebApplication.CreateBuilder(args);
var app = builder.Build();

app.MapGet("/", () => "This is a GET");
app.MapPost("/", () => "This is a POST");
app.MapPut("/", () => "This is a PUT");
app.MapDelete("/", () => "This is a DELETE");

app.Run();
.NET 6から採用された「トップレベルステートメント」を利用できるので、従来のようなusingおよびnamespaceステートメントの記載が基本的に不要です。各HTTPリクエストの処理もMapGet、MapPost、MapPut、MapDeleteメソッドで実装できます。上記は非常に簡単な例ですが10行程度のコードでWeb APIのベースを作成することができます。
Minimal APIを使用したASP.NET Core Web APIアプリケーションの作成
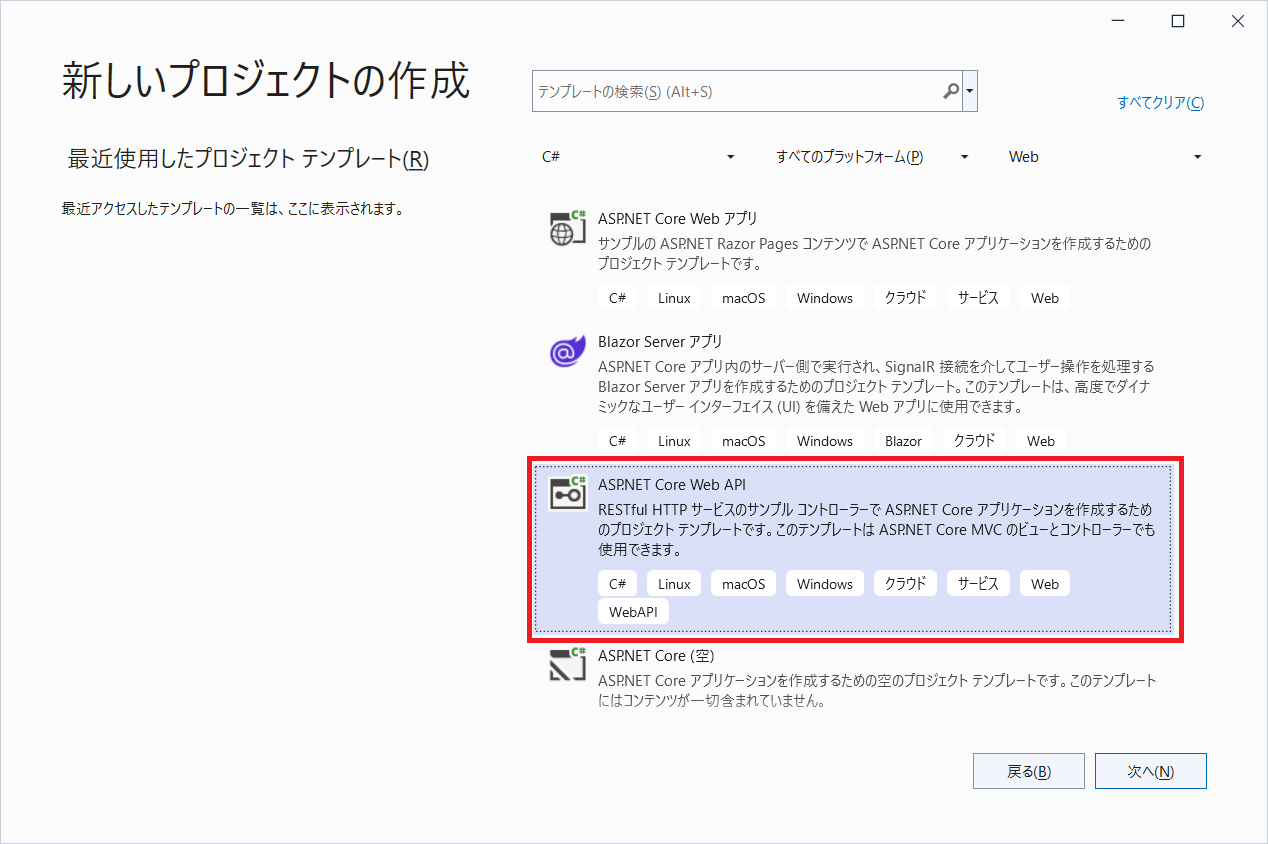
Visual Studio 2022でASP.NET Core Web APIアプリケーションを作成します。プロジェクトテンプレートから「ASP.NET Core Web API」を選択します。
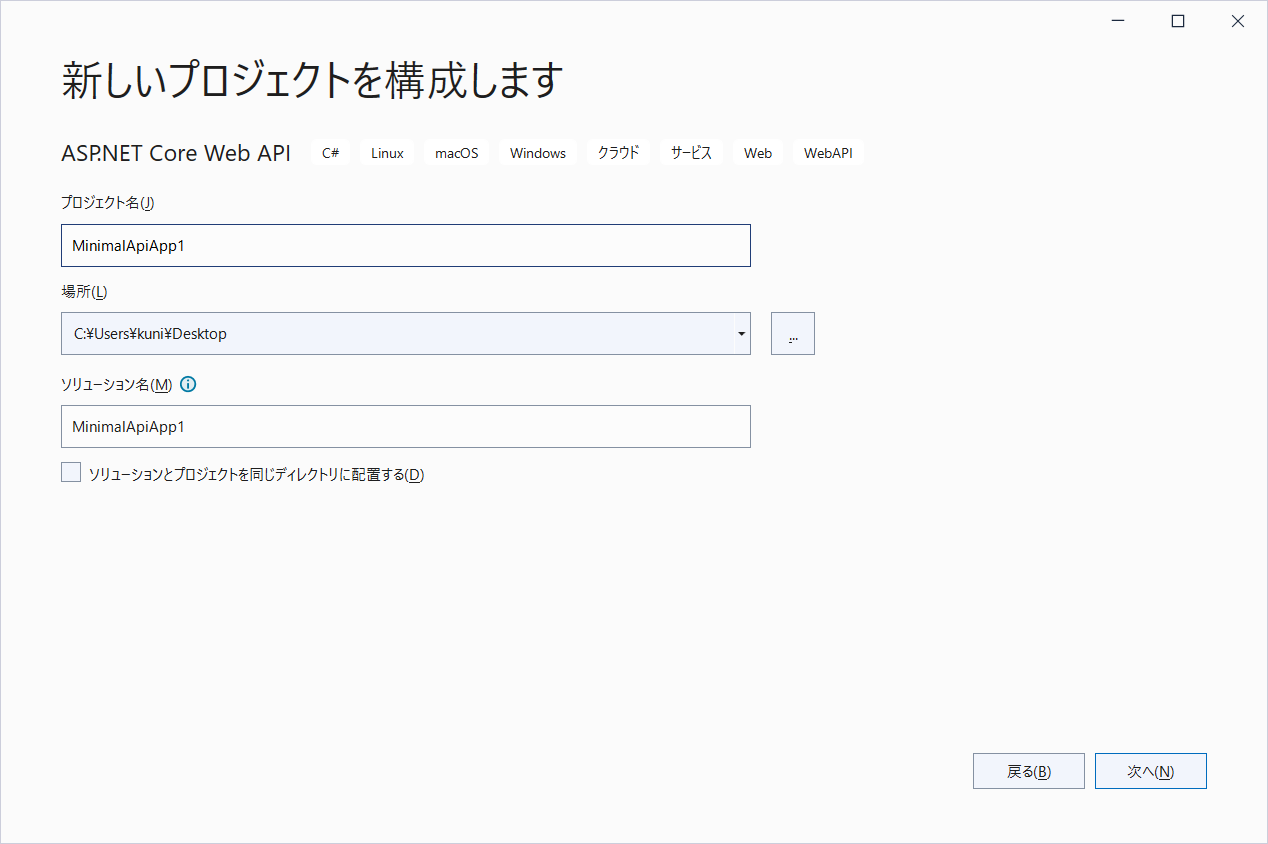
プロジェクト名には「MinimalApiApp1」を設定しています。
デフォルトで生成されているコードは以下になります。
var builder = WebApplication.CreateBuilder(args);

// Add services to the container.
// Learn more about configuring Swagger/OpenAPI at https://aka.ms/aspnetcore/swashbuckle
builder.Services.AddEndpointsApiExplorer();
builder.Services.AddSwaggerGen();

var app = builder.Build();

// Configure the HTTP request pipeline.
if (app.Environment.IsDevelopment())
{
    app.UseSwagger();
    app.UseSwaggerUI();
}

app.UseHttpsRedirection();

var summaries = new[]
{
    "Freezing", "Bracing", "Chilly", "Cool", "Mild", "Warm", "Balmy", "Hot", "Sweltering", "Scorching"
};

app.MapGet("/weatherforecast", () =>
{
    var forecast = Enumerable.Range(1, 5).Select(index =>
       new WeatherForecast
       (
           DateTime.Now.AddDays(index),
           Random.Shared.Next(-20, 55),
           summaries[Random.Shared.Next(summaries.Length)]
       ))
        .ToArray();
    return forecast;
})
.WithName("GetWeatherForecast");

app.Run();

internal record WeatherForecast(DateTime Date, int TemperatureC, string? Summary)
{
    public int TemperatureF => 32 + (int)(TemperatureC / 0.5556);
}
19~36行目と40~43行目のコードは今回は使用しないので、以下のように削除しておきます。
var builder = WebApplication.CreateBuilder(args);
// Add services to the container.
// Learn more about configuring Swagger/OpenAPI at https://aka.ms/aspnetcore/swashbuckle
builder.Services.AddEndpointsApiExplorer();
builder.Services.AddSwaggerGen();
var app = builder.Build();
// Configure the HTTP request pipeline.
if (app.Environment.IsDevelopment())
{
app.UseSwagger();
app.UseSwaggerUI();
}
app.UseHttpsRedirection();
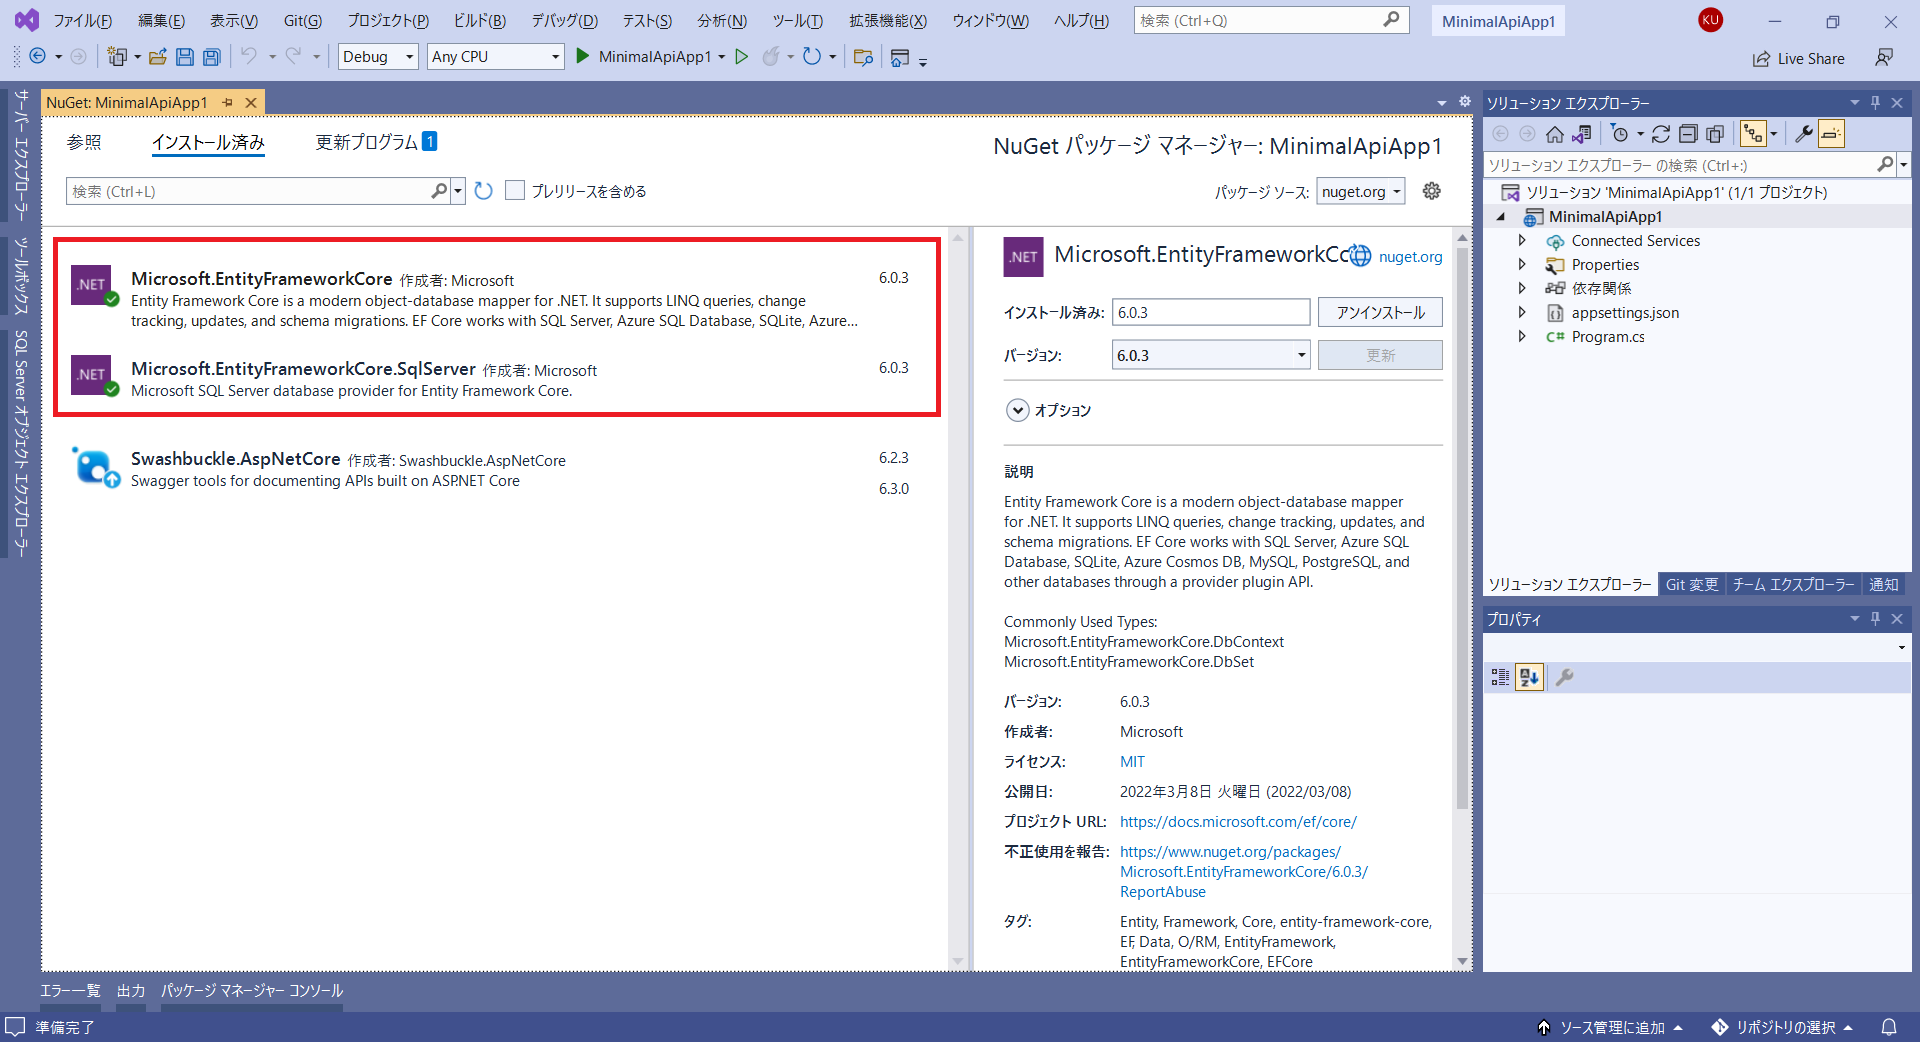
app.Run();このアプリケーションではSQL Databaseからデータを参照するのでEntity Framework CoreのNuGetパッケージMicrosoft.EntityFrameworkCore、Microsoft.EntityFrameworkCore.SqlServerをプロジェクトへインストールしておきます。
アプリケーションから参照するデータベース
作成したアプリケーションから参照するデータベースをAzure SQL Databaseに準備しておきます。作成時にサンプルデータベース「AdventureWorksLT」を使うように設定しておきます。
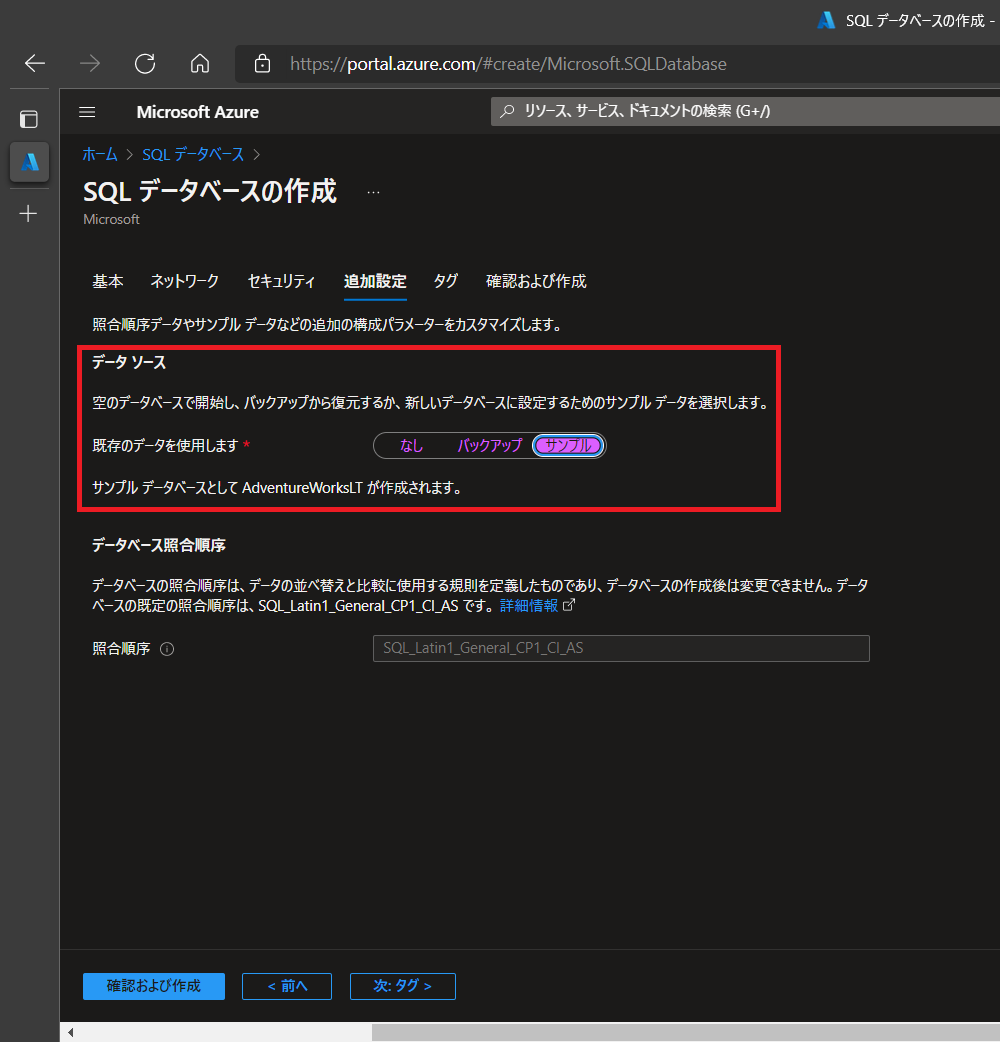
リソースグループは「test-database-rg」、SQL Serverは「test-db-server-1」、SQL Databaseは「test-database-1」としています。
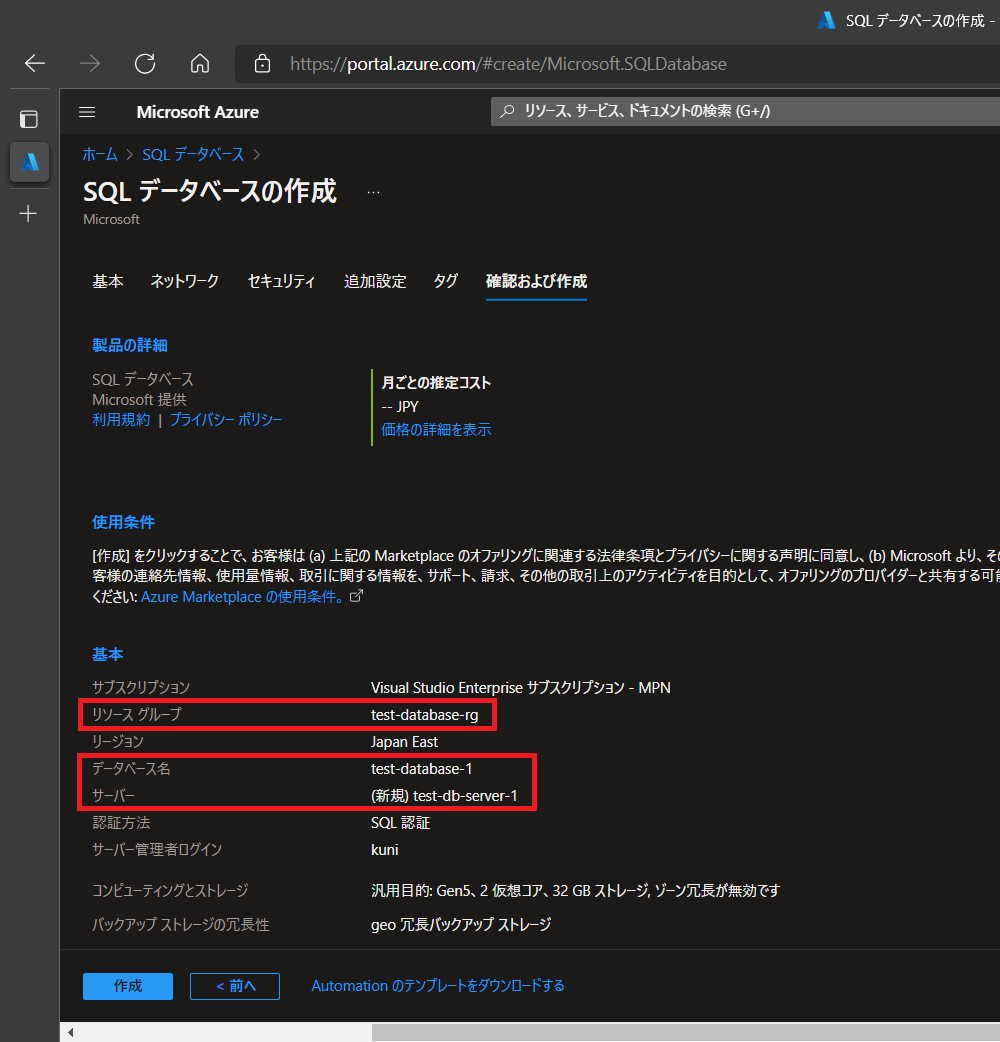
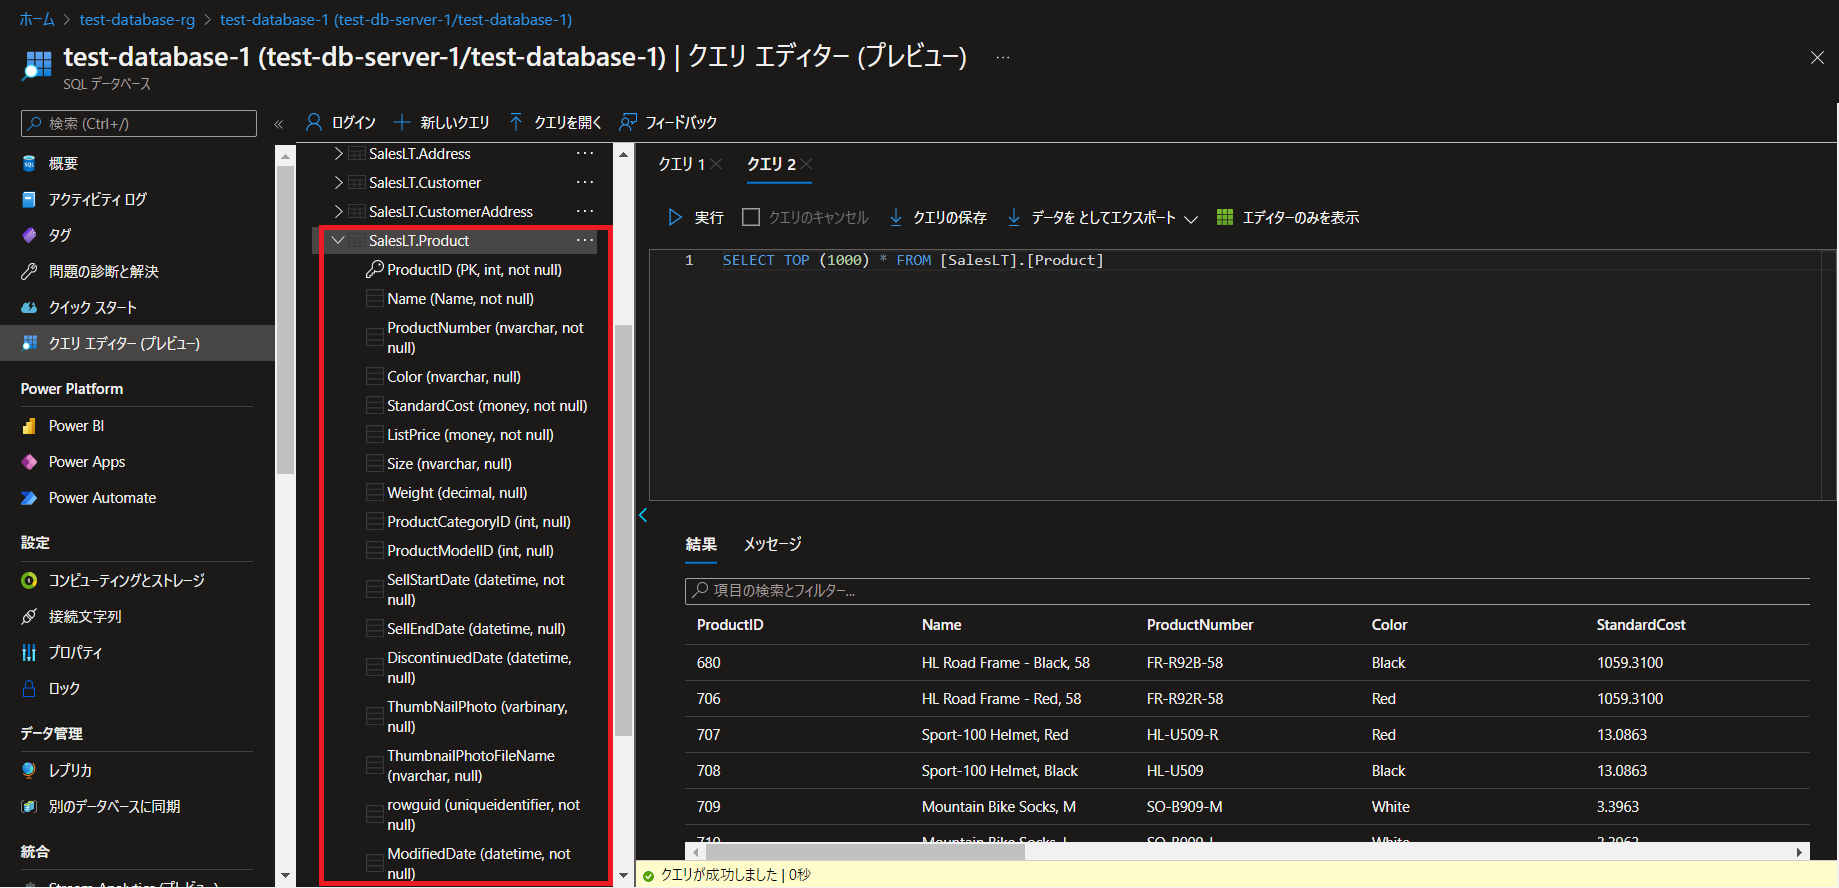
今回作成するアプリケーションからはサンプルデータベースに含まれる「SalesLT.Product」のデータを参照します。
データベースとの接続
appsettings.jsonに作成したデータベースへの接続文字列を設定します。
{
  "Logging": {
    "LogLevel": {
      "Default": "Information",
      "Microsoft.AspNetCore": "Warning"
    }
  },
    "AllowedHosts": "*",
    "ConnectionStrings": {
        "TestDb": "データベースへの接続文字列"
    }
}
モデルの追加
サンプルデータベースに含まれる「SalesLT.Product」のデータを保持するモデルとして Program.csにProductを追加します。
public class Product
{
    public int ProductId { get; set; }
    public string Name { get; set; } = null!;
    public string ProductNumber { get; set; } = null!;
    public string? Color { get; set; }
    public decimal StandardCost { get; set; }
    public decimal ListPrice { get; set; }
    public string? Size { get; set; }
    public decimal? Weight { get; set; }
    public int? ProductCategoryId { get; set; }
    public int? ProductModelId { get; set; }
    public DateTime SellStartDate { get; set; }
    public DateTime? SellEndDate { get; set; }
    public DateTime? DiscontinuedDate { get; set; }
    public byte[]? ThumbNailPhoto { get; set; }
    public string? ThumbnailPhotoFileName { get; set; }
    public Guid Rowguid { get; set; }
    public DateTime ModifiedDate { get; set; }
}
コンテキストの追加
Program.csにデータベースコンテキストTestDbContextを追加します。このコンテキストではOnModelCreatingメソッドでモデルProductとデータベースのテーブル「SalesLT.Product」をマッピングします。
さらにAddDbContextメソッドでTestDbContextをサービスに登録します。オプション設定でUseSqlServerメソッドでSQL Serverへの接続文字列を設定します。
using Microsoft.EntityFrameworkCore;

var builder = WebApplication.CreateBuilder(args);

// Add services to the container.
// Learn more about configuring Swagger/OpenAPI at https://aka.ms/aspnetcore/swashbuckle
builder.Services.AddEndpointsApiExplorer();
builder.Services.AddSwaggerGen();

builder.Services.AddDbContext<TestDbContext>(options =>
{
    options.UseSqlServer(builder.Configuration.GetConnectionString("TestDb"));
});

var app = builder.Build();

// Configure the HTTP request pipeline.
if (app.Environment.IsDevelopment())
{
    app.UseSwagger();
    app.UseSwaggerUI();
}

app.UseHttpsRedirection();

app.Run();

public class TestDbContext : DbContext
{
    public TestDbContext(DbContextOptions<TestDbContext> options) : base(options){ }
    public DbSet<Product> Products => Set<Product>();

    protected override void OnModelCreating(ModelBuilder modelBuilder)
    {
        modelBuilder.Entity<Product>().ToTable("Product", "SalesLT");
    }
}
HTTPリクエスト(GET)を処理するエンドポイントを追加
HTTPリクエストのGETメソッドでデータを取得するエンドポイント/product/readと/product/read/{id}をMapGetメソッドで追加します。
app.MapGet("/products/read", async (TestDbContext testDb) =>
{
    var products = await testDb.Products.ToListAsync();

    if (products == null) return Results.NotFound();

    return Results.Ok(products);
});

app.MapGet("/products/read/{id}", async (int id, TestDbContext testDb) =>
{
    var product = await testDb.Products.FindAsync(id);

    if (product == null) return Results.NotFound();

    return Results.Ok(product);
});
全体のコード
以上で完了です。ここまでのProgram.csのコードは以下のようになります。
using Microsoft.EntityFrameworkCore;

var builder = WebApplication.CreateBuilder(args);

// Add services to the container.
// Learn more about configuring Swagger/OpenAPI at https://aka.ms/aspnetcore/swashbuckle
builder.Services.AddEndpointsApiExplorer();
builder.Services.AddSwaggerGen();

builder.Services.AddDbContext<TestDbContext>(options =>
{
    options.UseSqlServer(builder.Configuration.GetConnectionString("TestDb"));
});

var app = builder.Build();

// Configure the HTTP request pipeline.
if (app.Environment.IsDevelopment())
{
    app.UseSwagger();
    app.UseSwaggerUI();
}

app.UseHttpsRedirection();

app.MapGet("/products/read", async (TestDbContext testDb) =>
{
    var products = await testDb.Products.ToListAsync();

    if (products == null) return Results.NotFound();

    return Results.Ok(products);
});

app.MapGet("/products/read/{id}", async (int id, TestDbContext testDb) =>
{
    var product = await testDb.Products.FindAsync(id);

    if (product == null) return Results.NotFound();

    return Results.Ok(product);
});

app.Run();

public class TestDbContext : DbContext
{
    public TestDbContext(DbContextOptions<TestDbContext> options) : base(options){ }
    public DbSet<Product> Products => Set<Product>();

    protected override void OnModelCreating(ModelBuilder modelBuilder)
    {
        modelBuilder.Entity<Product>().ToTable("Product", "SalesLT");
    }
}

public class Product
{
    public int ProductId { get; set; }
    public string Name { get; set; } = null!;
    public string ProductNumber { get; set; } = null!;
    public string? Color { get; set; }
    public decimal StandardCost { get; set; }
    public decimal ListPrice { get; set; }
    public string? Size { get; set; }
    public decimal? Weight { get; set; }
    public int? ProductCategoryId { get; set; }
    public int? ProductModelId { get; set; }
    public DateTime SellStartDate { get; set; }
    public DateTime? SellEndDate { get; set; }
    public DateTime? DiscontinuedDate { get; set; }
    public byte[]? ThumbNailPhoto { get; set; }
    public string? ThumbnailPhotoFileName { get; set; }
    public Guid Rowguid { get; set; }
    public DateTime ModifiedDate { get; set; }
}
エンドポイント(/product/read)をテストする
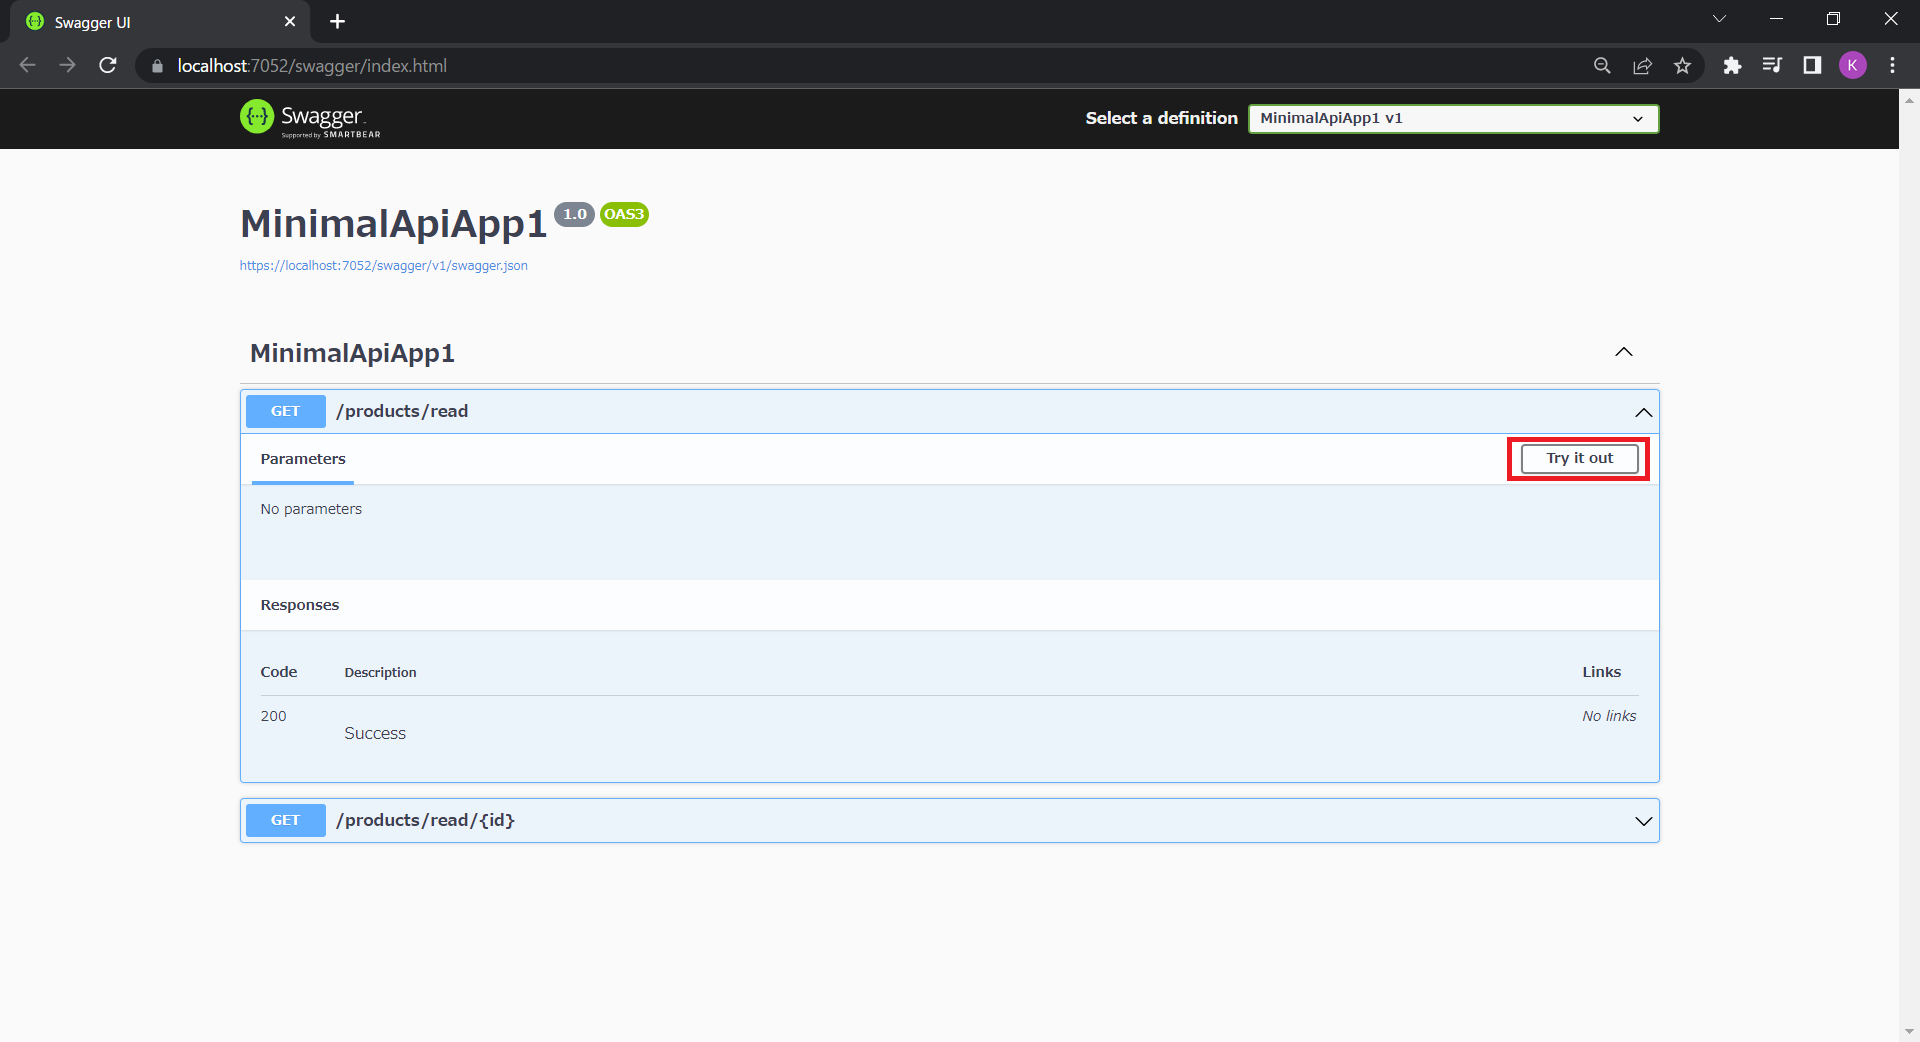
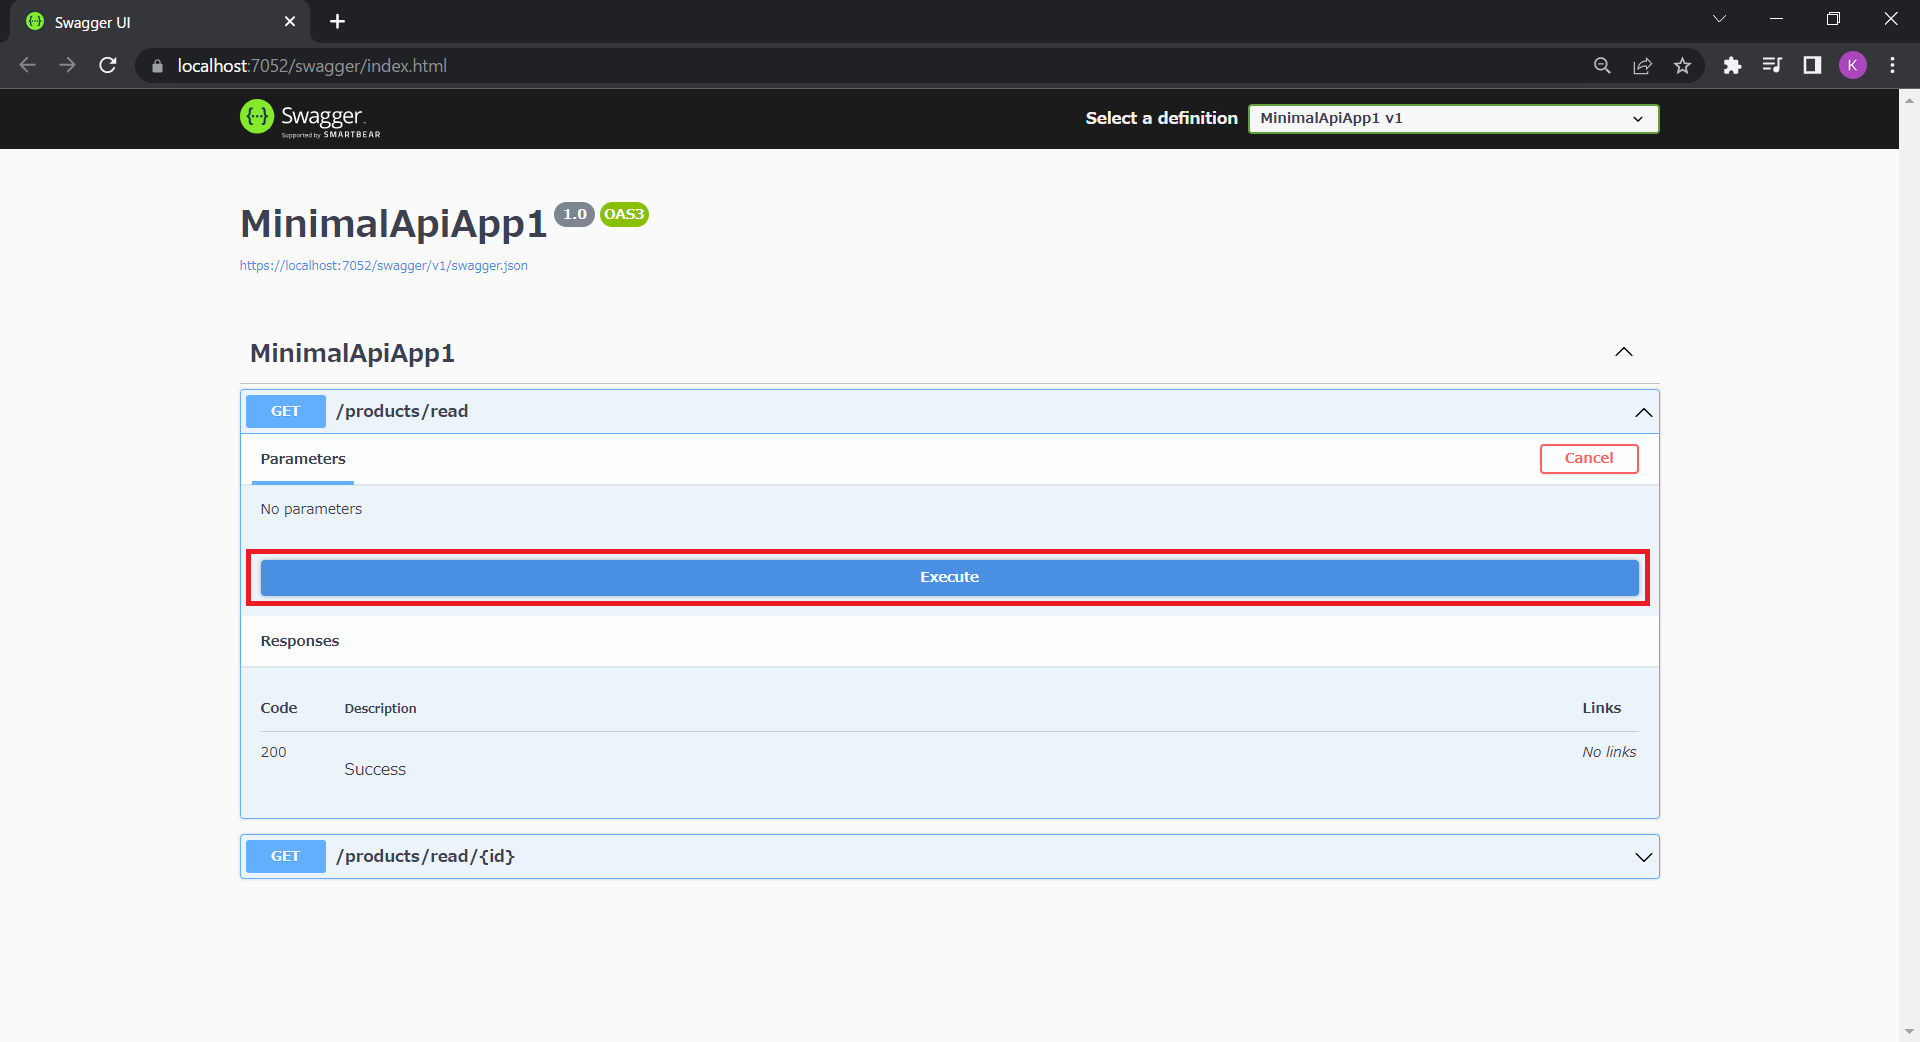
Swagger UIもしくはPostmanを使用してエンドポイントをテストします。Swagger UIを使用する場合には[Try it out]をクリックして表示される[Excecute]をクリックします。
以下のようにデータベースのテーブル「SalesLT.Product」からデータを取得できます。

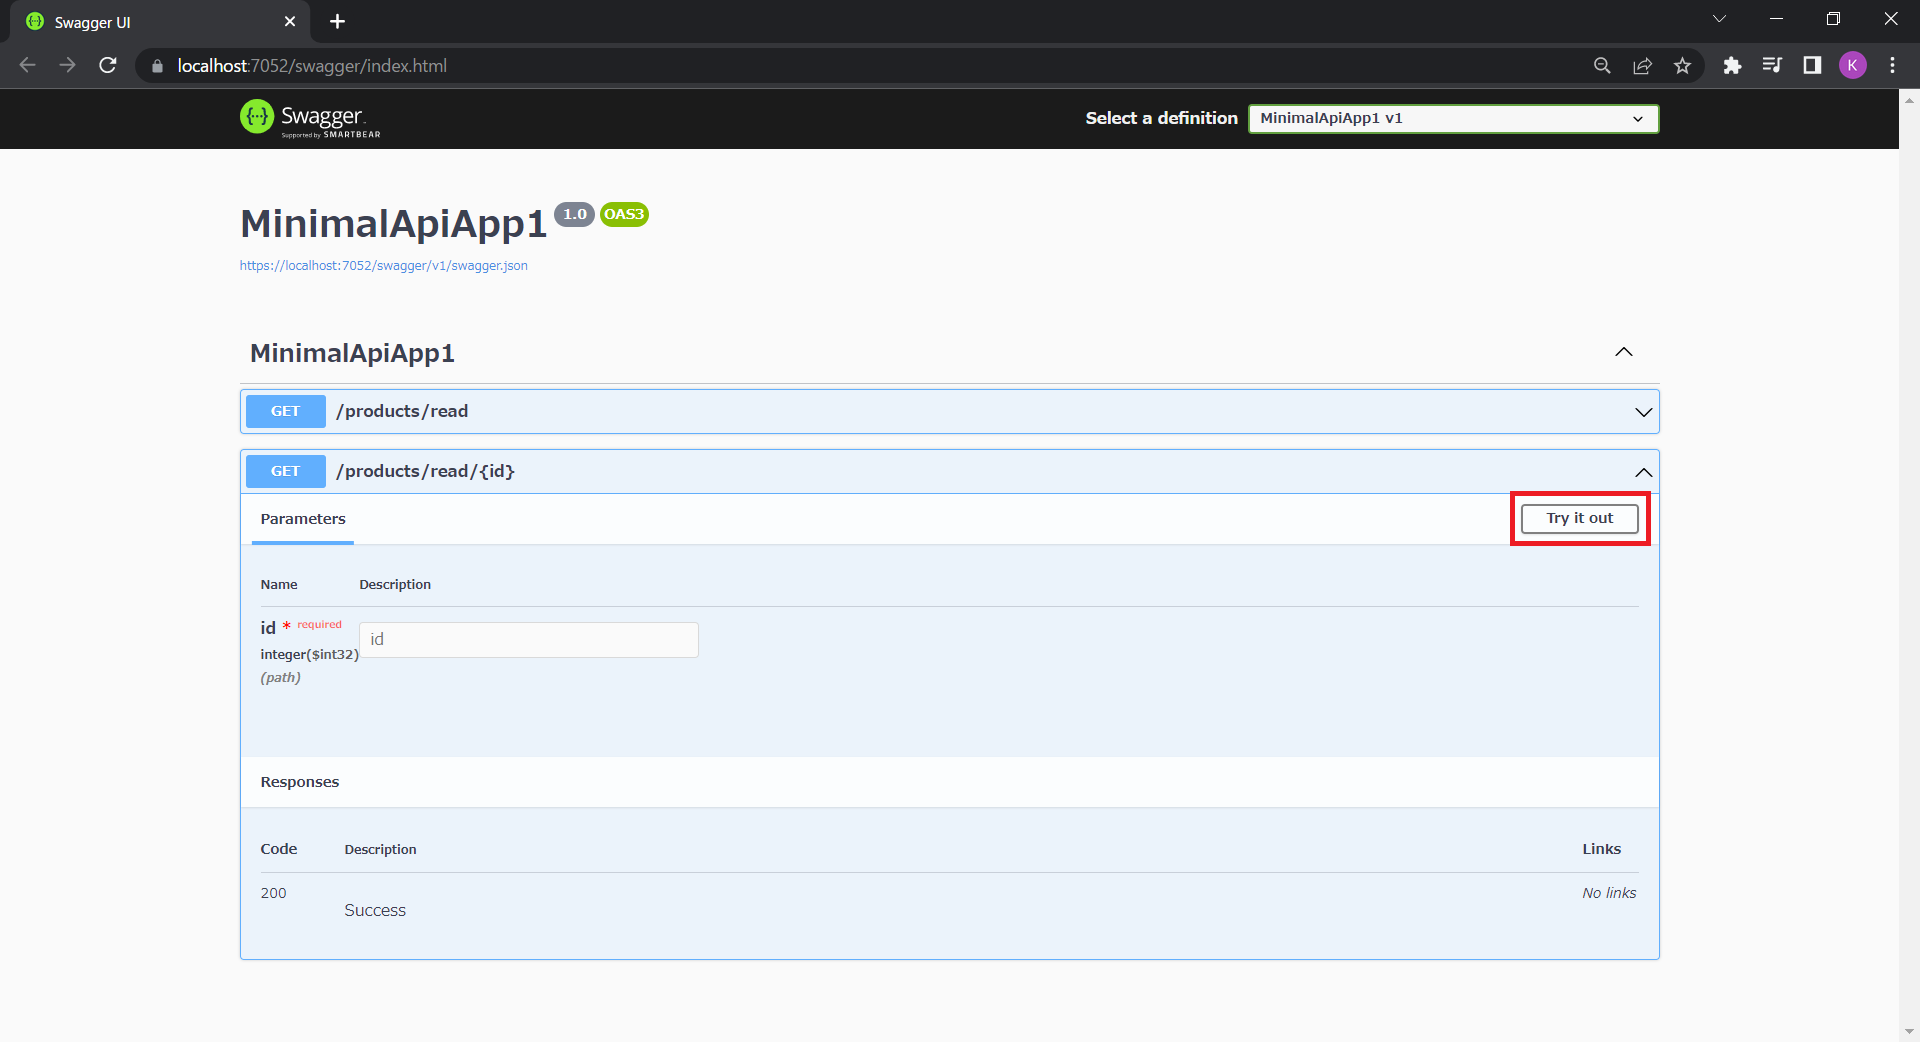
エンドポイント(/product/read/{id})をテストする
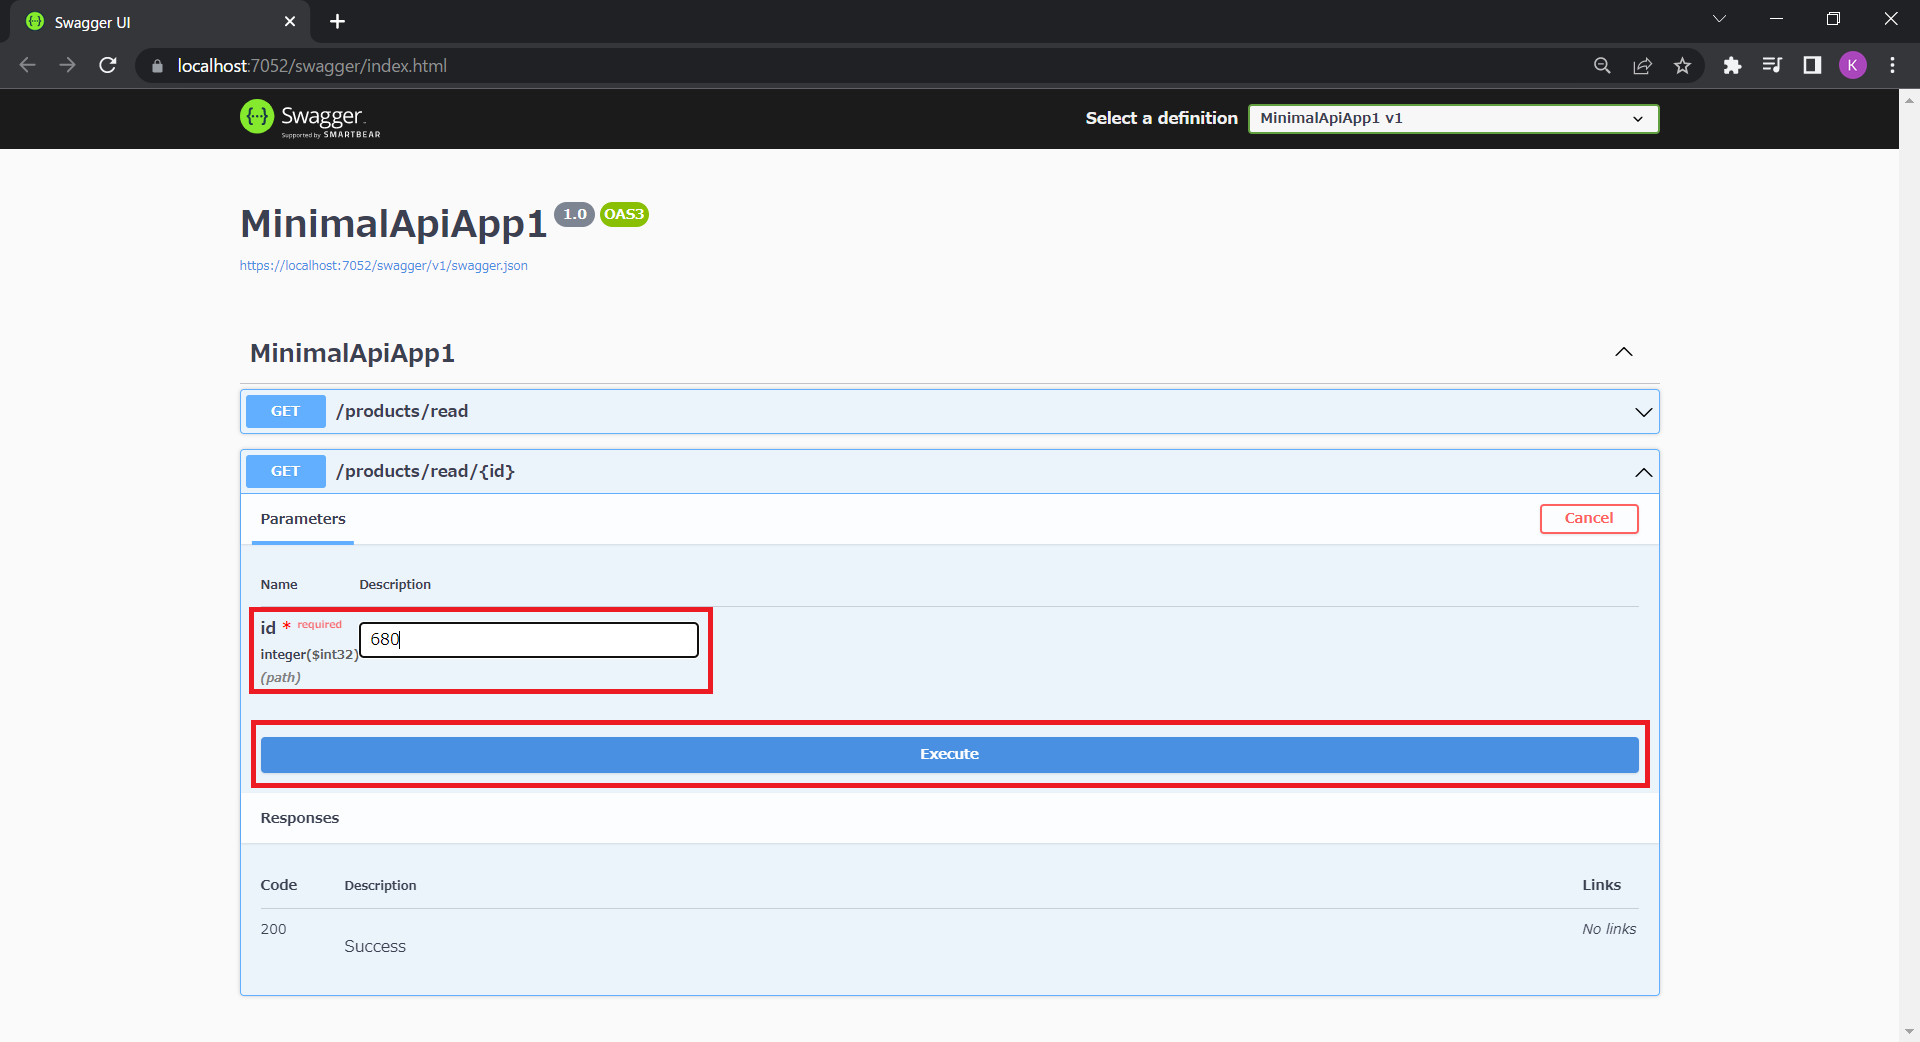
同じようにSwagger UIもしくはPostmanを使用してエンドポイントをテストします。Swagger UIを使用する場合には[Try it out]をクリックして、表示されるidに取得したいデータのproductIDを入力して[Excecute]をクリックします。
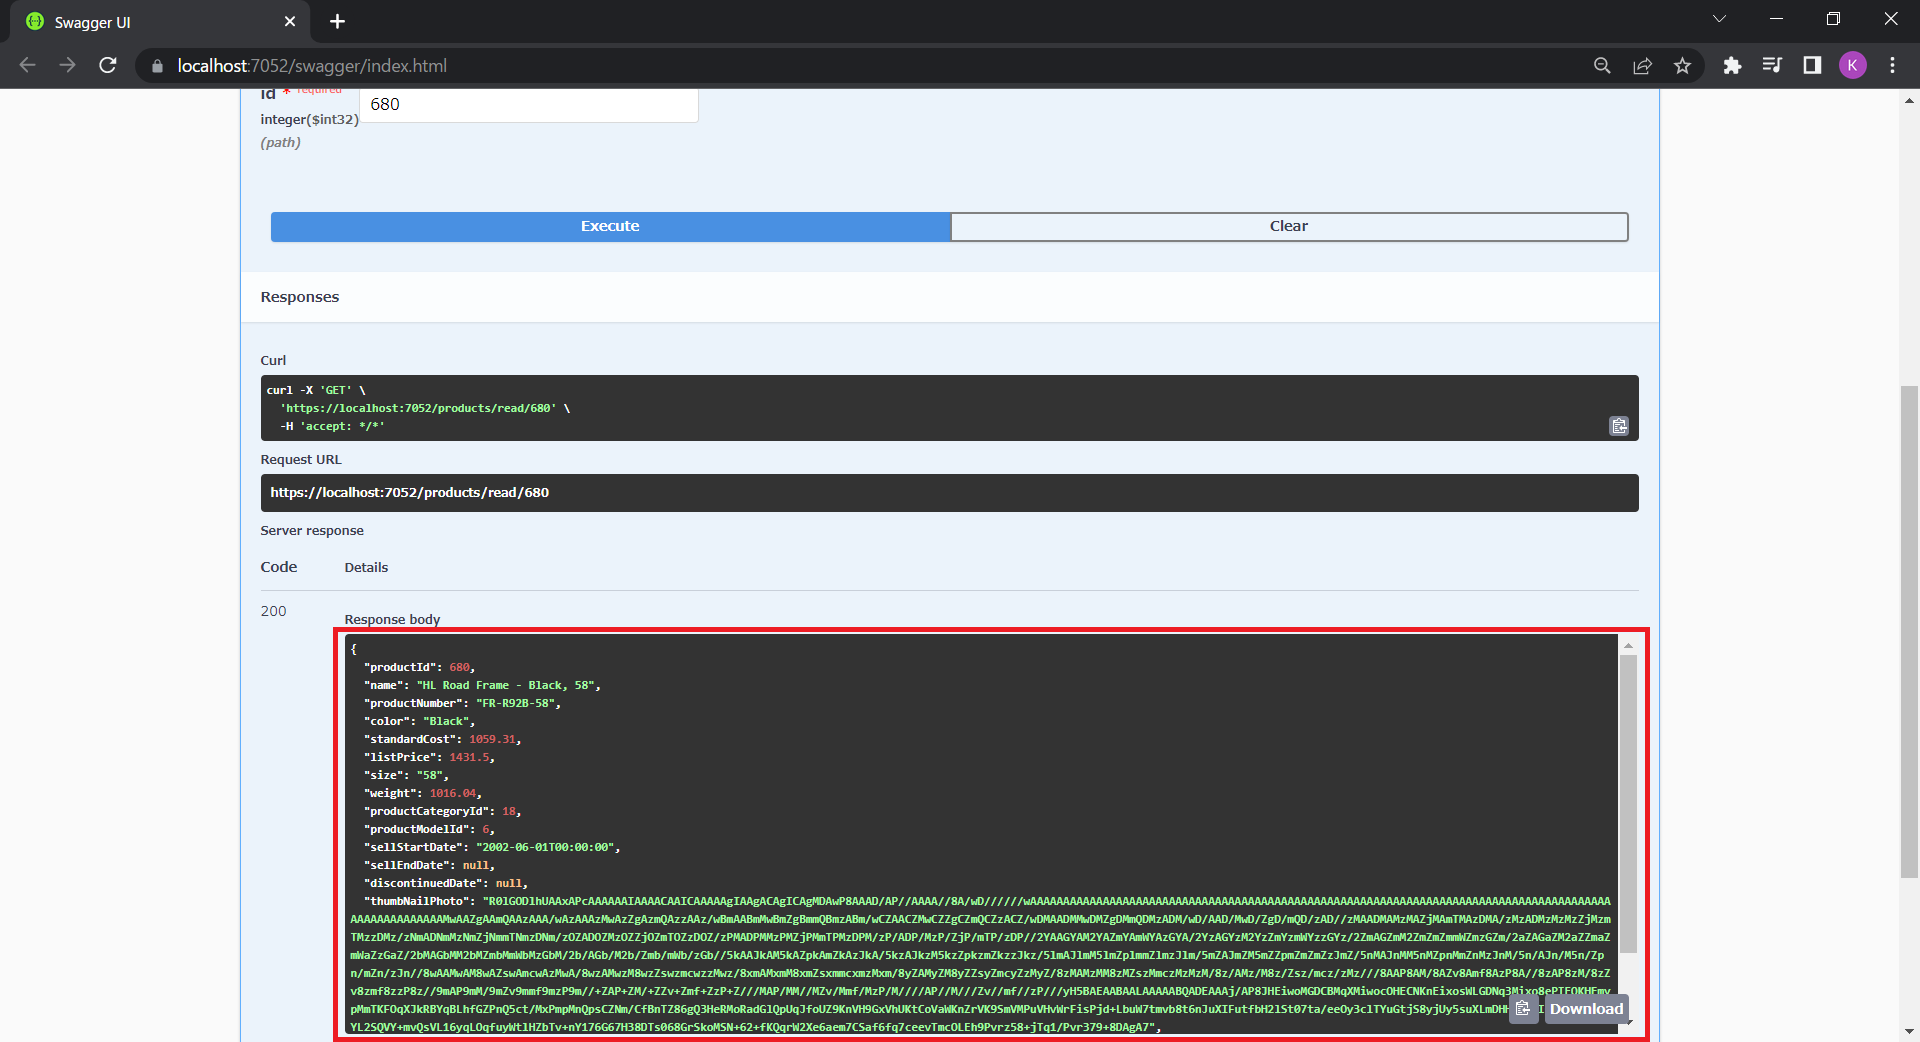
以下のようにデータベースのテーブル「SalesLT.Product」からデータを取得できます。
データ転送オブジェクト(Data Transfer Object、DTO)を設定する
上記で使用しているモデルproductはデータベースのテーブル「SalesLT.Product」からすべての列のデータを取得していますが、クライアントアプリケーションでは参照させたくない列のデータも存在するケースがあります。 顧客アカウント情報であればパスワードだったり、商品情報であれば原価などが該当します。このようなケースで利用されるのが「データ転送オブジェクト(DTO)」で、クライアントアプリケーションに必要なデータだけを提供することができます。
まずは以下のようなDTOモデルを作成します。
public class ProductDto
{
    public int ProductId { get; set; }
    public string Name { get; set; } = null!;
    public string ProductNumber { get; set; } = null!;
    public string? Color { get; set; }
    public decimal ListPrice { get; set; }
    public string? Size { get; set; }
    public decimal? Weight { get; set; }

    public ProductDto(Product product) =>
    (ProductId, Name, ProductNumber, Color, ListPrice, Size, Weight) = (product.ProductId, product.Name, product.ProductNumber, product.Color, product.ListPrice, product.Size, product.Weight);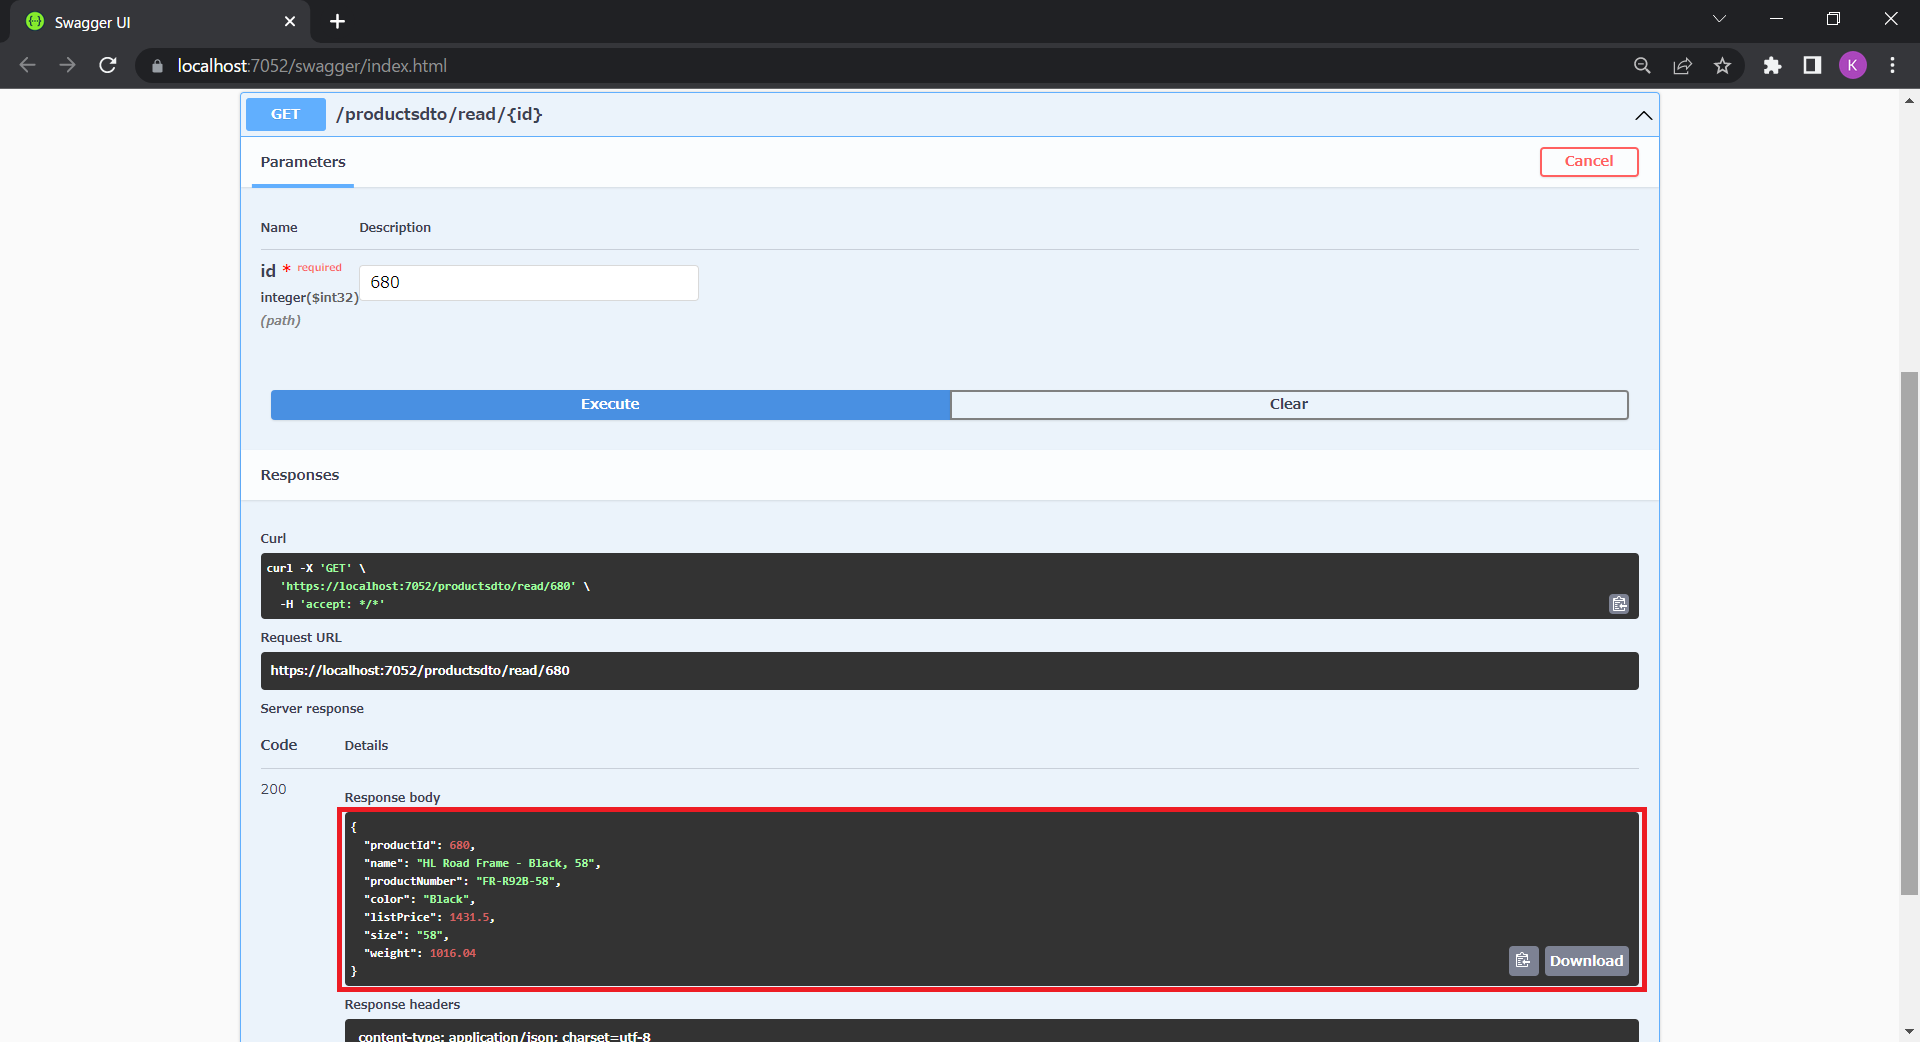
}続いてDTOモデルを使用したエンドポイント/productsdto/readと/productsdto/read/{id}を追加します。
app.MapGet("/productsdto/read", async (TestDbContext testDb) =>
{
var productsdto = await testDb.Products.Select(x => new ProductDto(x)).ToListAsync();
if (productsdto == null) return Results.NotFound();
return Results.Ok(productsdto);
});
app.MapGet("/productsdto/read/{id}", async (int id, TestDbContext testDb) =>
{
var product = await testDb.Products.FindAsync(id);
if (product == null) return Results.NotFound();
return Results.Ok(new ProductDto(product));
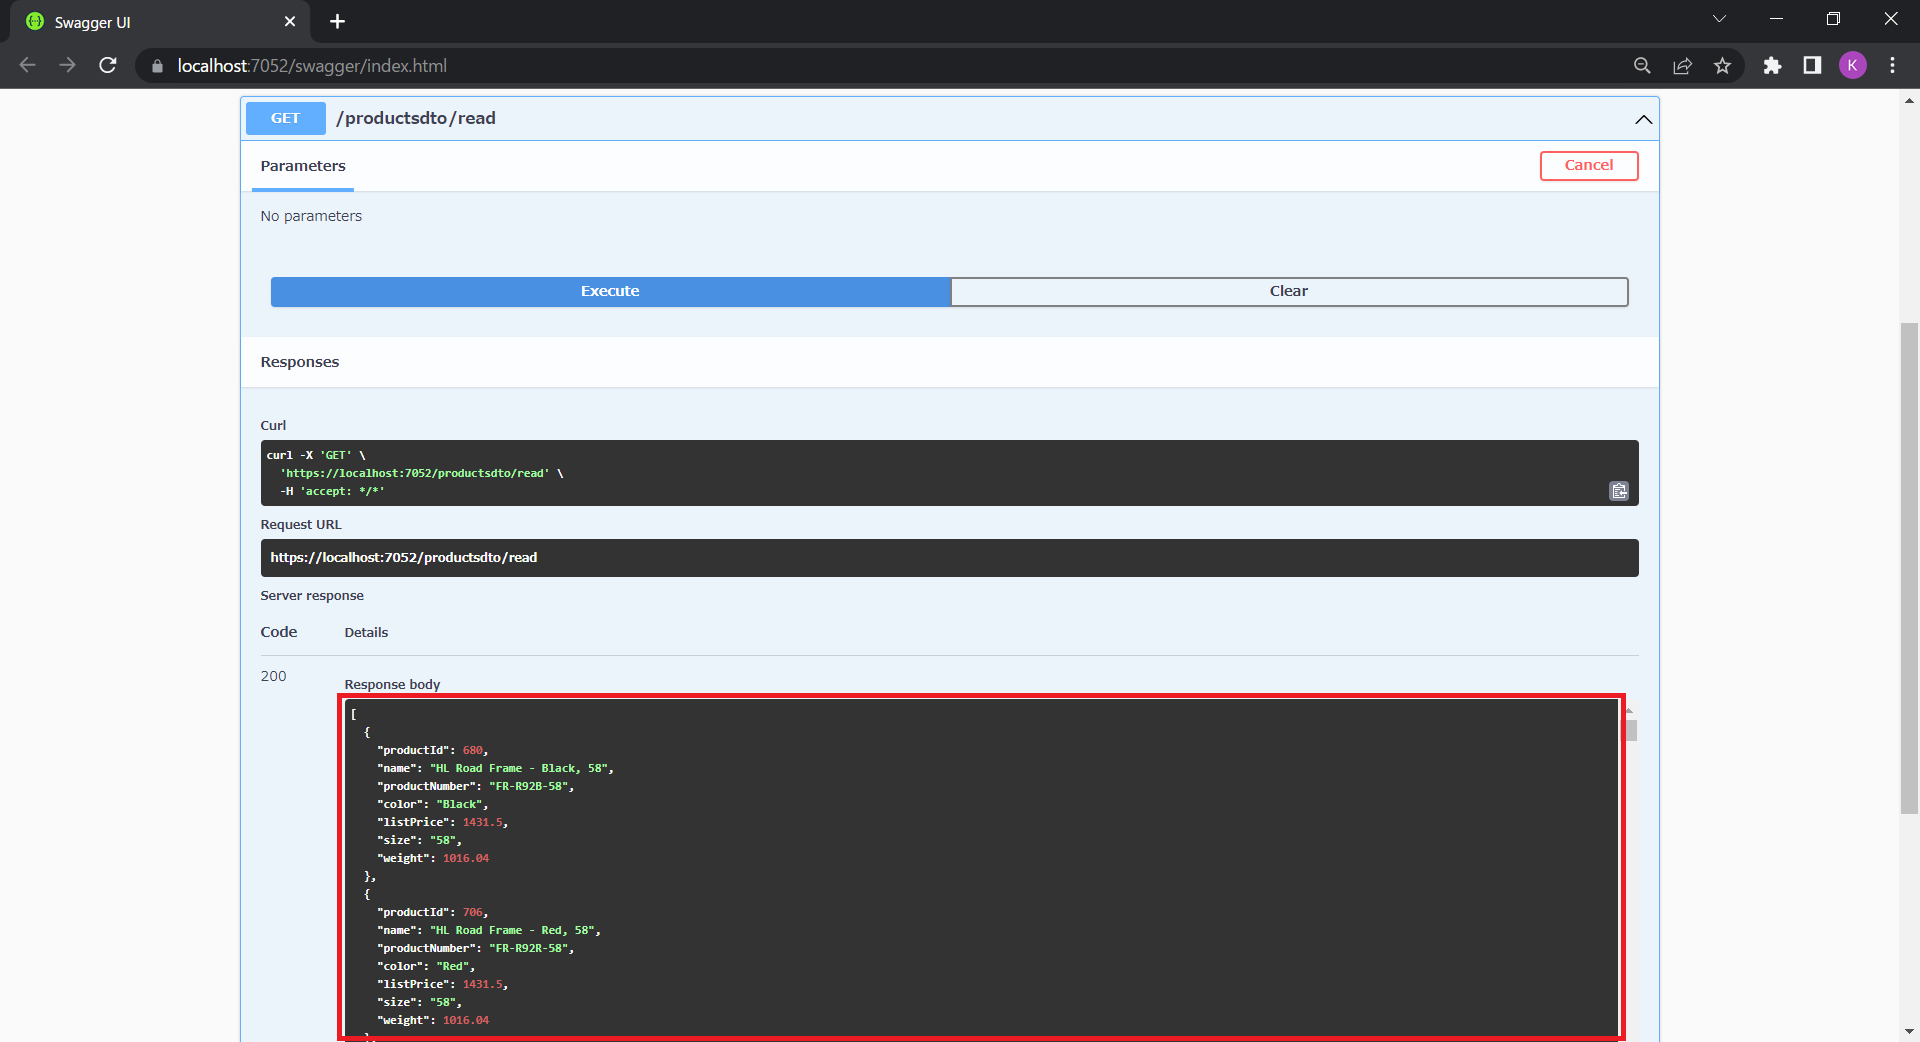
});以上で完了です。作成したエンドポイントをそれぞれテストしてみます。どちらのエンドポイントでもDTOモデルで定義されたデータのみが取得できます。
さいごに
今回はMinimal APIとEntity Framework CoreでSQL Serverからデータを取得するWeb APIを作成してみました。個人的には従来のコントローラーを使用したWeb APIよりもシンプルなコードで実装できそうで使い勝手がよさそうに感じました。Minimal APIは .NET 7でも機能拡張が予定されているので引き続き確認していきたいと思います。
上記コードを実装しているサンプルはコチラです。
https://github.com/GrapeCityJP/MinimalApiApp1
参考
チュートリアル: ASP.NET Core で Minimal Web API を作成する