ActiveReportsのバージョン9.0Jで追加されたJavaScript ライブラリ「HTML5ビューワ」の外観はCSSを使って簡単にカスタマイズすることができます。今回はWindowsフォーム用のビューワでも問い合わせの多い、ビューワのツールバー部分をカスタマイズ(不要なボタンの削除など)する方法をご紹介します。
事前準備
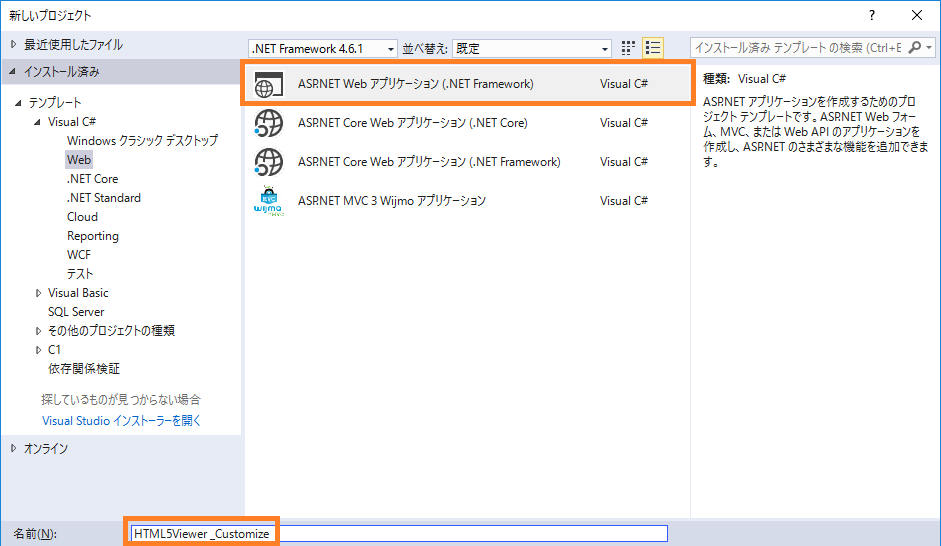
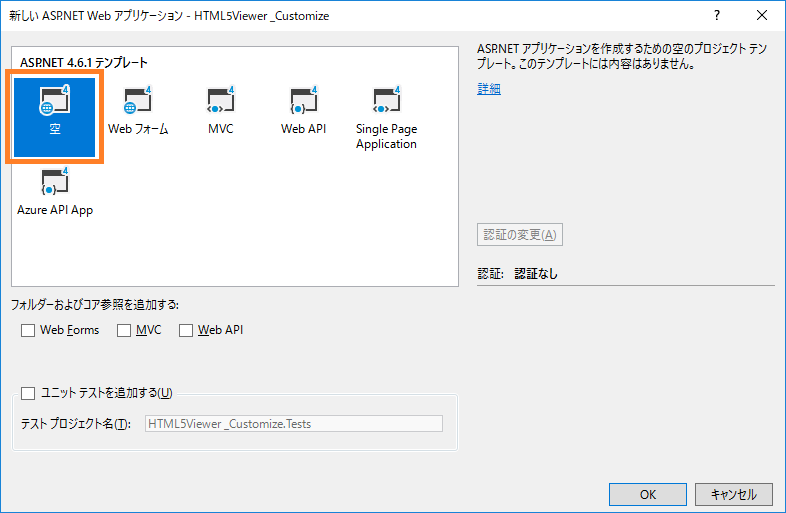
事前準備として、ベースとなる、HTML5ビューワで帳票を表示するアプリケーションを作成します。Visual Studio 2017を開き、 「Visual C#」⇒「Web」のテンプレートから「ASP.NET Web アプリケーション(.NET Framework)」⇒「空」のテンプレートを選択します。
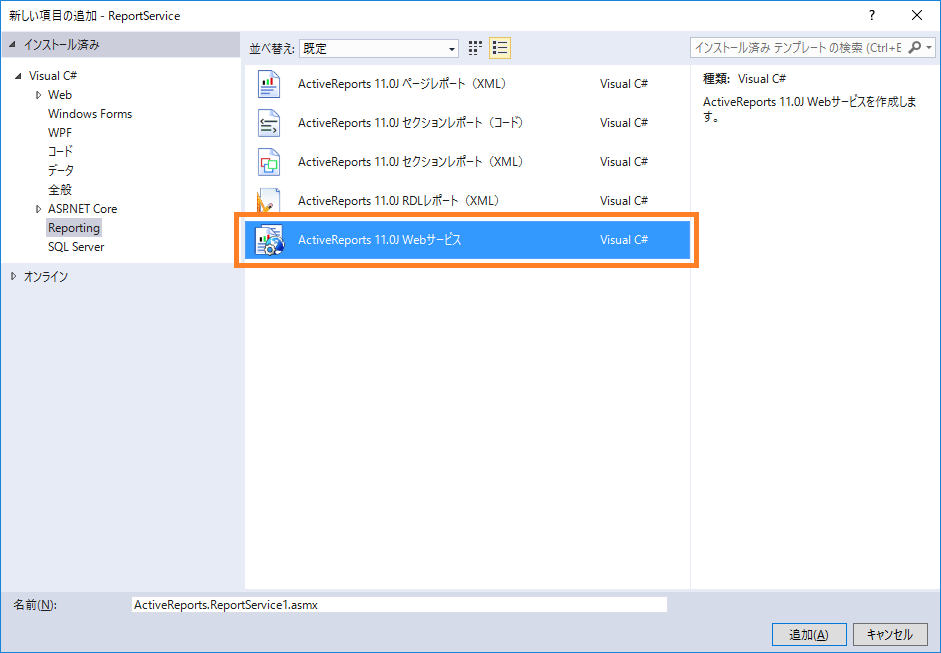
作成されたプロジェクトを右クリックして、「追加」⇒「新しい項目」を選択し、「Reporting」から「ActiveReports 11.0J Webサービス」を追加します。
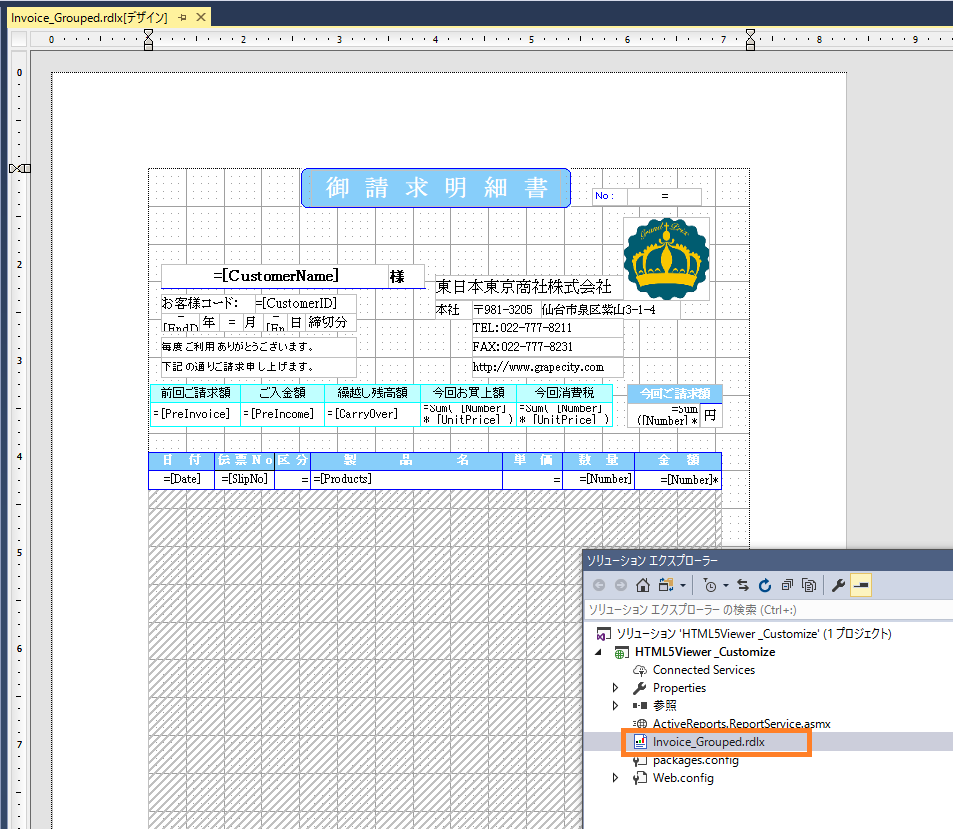
レポートファイルを追加します。今回は製品サンプルのレポートギャラリーサンプルに含まれる請求書のサンプルInvoice_Grouped.rdlxをプロジェクトに追加してそのまま使いたいと思います。
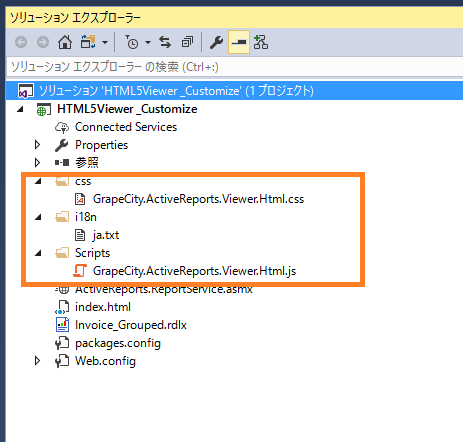
「css」、「i18n」、「Scripts」のフォルダをそれぞれ作成し、HTML5ビューワの表示に必要な以下のJSやCSSなどの静的ファイルをプロジェクトに追加します。これらのファイルは製品のインストールフォルダの配下(…\ActiveReportsNET11\Deployment\Html)より取得できます。
- css/GrapeCity.ActiveReports.Viewer.Html.css
- i18n/ja.txt
- Scripts/GrapeCity.ActiveReports.Viewer.Html.js
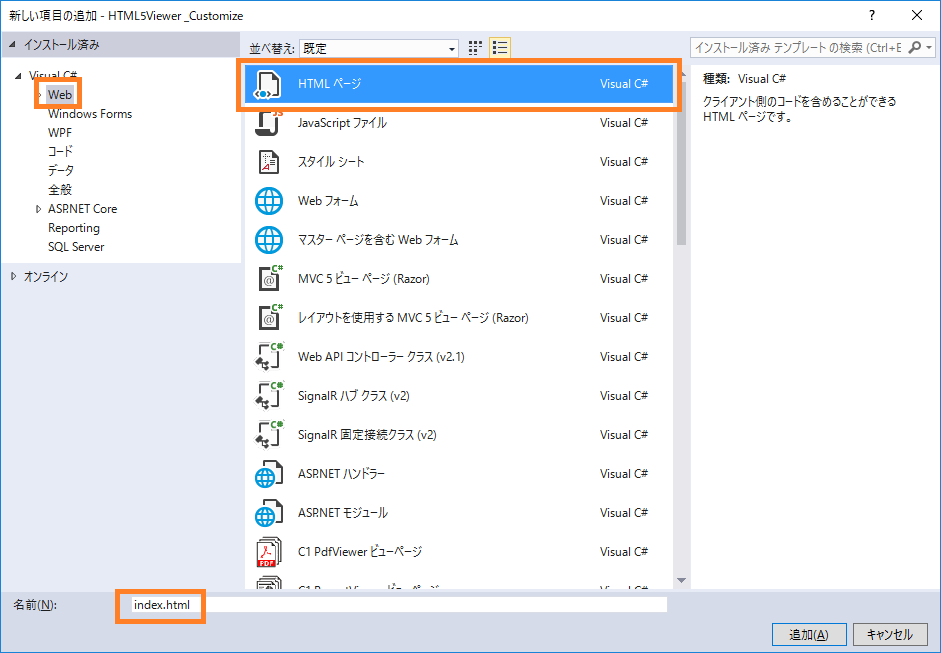
次にHTMLファイルを作成し、HTML5ビューワを組み込みます。プロジェクトを右クリックして、「追加」⇒「新しい項目」をクリックし、「Web」のテンプレートから「HTMLページ」を選択し、名前をindex.htmlとして、中身を以下のように書き換えます。HTML5ビューワはJQuery、BootStrap、Knockoutと依存性があります。これらを前述の静的ファイルと同じようにプロジェクトに組み込んで参照させることもできますが、今回はすべてCDNから参照しています。
<!DOCTYPE html>
<html>
<head>
    <meta charset="utf-8" />
    <title></title>
    <link rel="stylesheet" href="//maxcdn.bootstrapcdn.com/bootstrap/3.3.1/css/bootstrap.min.css" />
</head>
<body>
<link rel="stylesheet" href="css/GrapeCity.ActiveReports.Viewer.Html.css">
<script src="//ajax.googleapis.com/ajax/libs/jquery/3.2.1/jquery.min.js"></script>
<script src="//netdna.bootstrapcdn.com/bootstrap/3.3.7/js/bootstrap.min.js"></script>
<script src="//cdnjs.cloudflare.com/ajax/libs/knockout/3.4.2/knockout-min.js" type="text/javascript"></script>
<script src="Scripts/GrapeCity.ActiveReports.Viewer.Html.js" type="text/javascript"></script>
<script type="text/javascript">
        var viewer;
        $(function () {
            viewer = GrapeCity.ActiveReports.Viewer(
                {
                    element: '#viewer',
                    report: {
                        id: "Invoice_Grouped.rdlx"
                    },
                    reportService: {
                        url: '/ActiveReports.ReportService.asmx'
                    },
                    uiType: 'desktop',
                    localeUri: 'i18n/ja.txt'
                });
        });
    </script>
<div style="margin:10px">
<div id="viewer" style="width: 1200px; height: 900px"></div>
</div>
</body>
</html>
プロジェクトのPropertiesフォルダにlicenses.licxファイルを作成し、以下のコードを貼り付けてアプリケーションにライセンスを組み込みます。
GrapeCity.ActiveReports.SectionReport, GrapeCity.ActiveReports.v11
GrapeCity.ActiveReports.PageReport, GrapeCity.ActiveReports.v11
GrapeCity.ActiveReports.Export.Pdf.Section.PdfExport, GrapeCity.ActiveReports.Export.Pdf.v11
GrapeCity.ActiveReports.Web.WebViewer, GrapeCity.ActiveReports.Web.v11
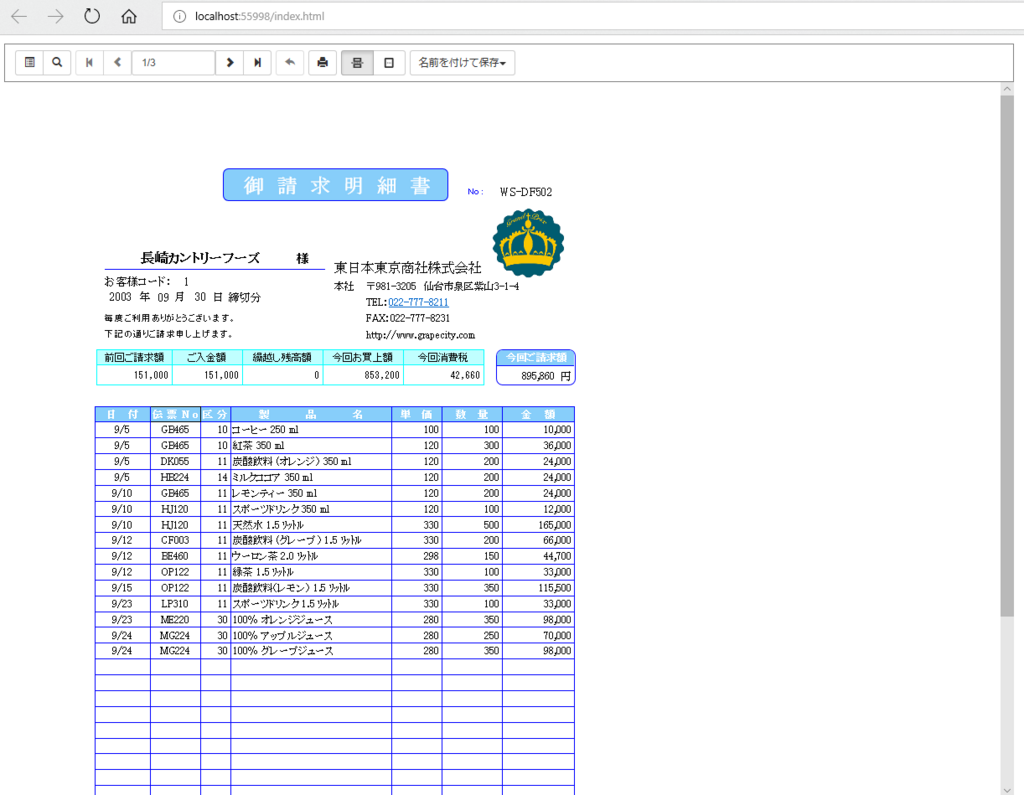
一度アプリケーションを実行してみます。以下のようにデフォルトのスタイルのHTML5ビューワ上に帳票が表示されます。
ツールバーのカスタマイズ
それではここからツールバーをカスタマイズしていきたいと思います。といっても、残念ながらHTML5ビューワには簡単にツールバーをカスタマイズする機能が用意されていません。ただし、HTML5ビューワにはUIを自由にカスタマイズする機能があるので、これを応用しAPIと組み合わせることで好みのツールバーを作成することができます。
今回はツールバーから不要なボタンを削除して、以下の項目のみ表示されるようにカスタマイズしてみます。
- 先頭ページ
- 前ページ
- 現在のページ
- 次ページ
- 最終ページ
- 印刷
最初に先ほど追加したスクリプト中の uiType プロパティの値を「custom」に変更します。
uiType: 'custom',
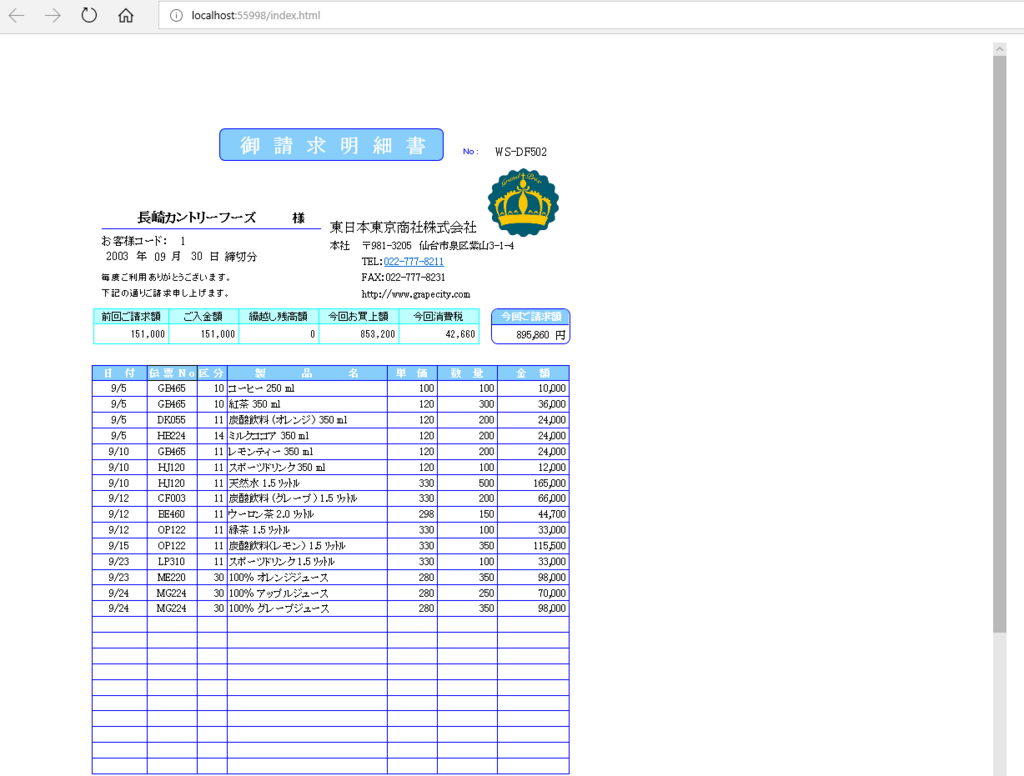
ここで一度実行してみると、ツールバーが完全に消えて、帳票のみのWebページが表示されます。この状態がHTML5ビューワのカスタマイズの基本形になるので、ここから必要なボタンを追加していきます。
前述の通り、各ボタンの処理はHTML5ビューワがあらかじめ用意しているAPIなどを利用して、自前ですべて実装する必要があるので、以下のJavaScriptのコードを追加し、各ボタンに必要な処理を実装します。
// 先頭ページ
function firstPage() {
viewer.goToPage(1);
dispPage();
}
// 現在のページ番号
function dispPage() {
var c = viewer.currentPage;
var t = viewer.pageCount;
$('#currentPage').val(c + '/' + t);
}
// 前ページ
function prevPage() {
if (viewer.currentPage != 1) {
var page = viewer.currentPage;
page -= 1;
viewer.goToPage(page);
dispPage();
}
}
// 次ページ
function nextPage() {
if (viewer.currentPage != viewer.pageCount) {
var page = viewer.currentPage;
page += 1;
viewer.goToPage(page);
dispPage();
}
}
// 最終ページ
function lastPage() {
viewer.goToPage(viewer.pageCount);
dispPage();
}
// 印刷
function print() {
viewer.print()
}
また、 documentLoaded のコールバック処理の中でも、現在のページ番号を表示する関数を呼び出します。
・・・(抜粋)
uiType: 'custom',
localeUri: 'i18n/ja.txt',
// 以下を追加
documentLoaded: function () {
dispPage();
}
・・・
次にツールバーのボタンを追加します。前述のとおり、ActiveReport の HTML5ビューワは Bootstrap を使用しており、アイコンも Bootstrap の Glyphicons を使用しています。(一部svg形式の独自のアイコンも使用しています。)
今回は同じように Bootstrap の Glyphicons を使用しつつ、各ボタンのサイズを少し大きく調整してみます。HTML5ビューワを定義した<div>タグの上に、以下のようにコードを追加します。
<div style="margin:10px">
<div class="btn-group btn-group-sm">
<button class="btn btn-default" onclick="firstPage()" title="先頭ページ">
<i class="glyphicon glyphicon-step-backward" style="font-size:17.5px" /></i>
</button>
<button class="btn btn-default" id="prevPage" onclick="prevPage()" title="前ページ">
<i class="glyphicon icon-large glyphicon-chevron-left" style="font-size:17.5px" /></i>
</button>
<div class="navbar-left input-group">
<input class="form-control" type="text" id="currentPage" style="font-size:20px" readonly /></i>
</div>
<button class="btn btn-default" id="nextPage" onclick="nextPage()" title="次ページ">
<i class="glyphicon icon-large glyphicon-chevron-right" style="font-size:17.5px" /></i>
</button>
<button class="btn btn-default" onclick="lastPage()" title="最終ページ">
<i class="glyphicon icon-large glyphicon-step-forward" style="font-size:17.5px"></i>
</button>
</div>
<div class="btn-group btn-group-sm">
<button class="btn btn-default" onclick="print()" title="印刷">
<i class="glyphicon glyphicon-print" style="font-size:17.5px"></i>
</button>
</div>
<div id="viewer" style="width: 1200px; height: 900px"></div>
</div>
実行すると以下のようにページ上部にカスタマイズしたツールバーが表示されます。
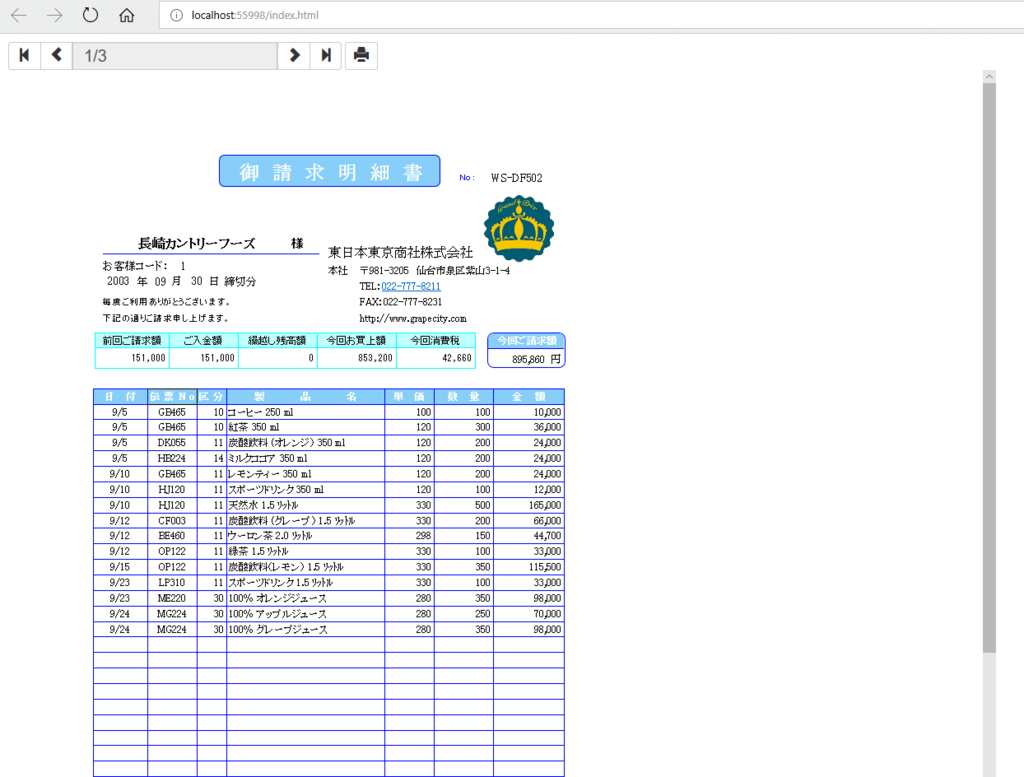
Font Awesomeを使用してエクスポートボタンをカスタマイズ
次に表示している帳票をPDFやExcelにエクスポートするボタンを追加してみたいと思います。Glyphicons にはファイル形式を表現できるアイコンがなかったので、Font Awesome のアイコンも併用してみたいと思います。以下のコードを<head>タグの間に追加します。
<link href="//maxcdn.bootstrapcdn.com/font-awesome/4.7.0/css/font-awesome.min.css" rel="stylesheet" integrity="sha384-wvfXpqpZZVQGK6TAh5PVlGOfQNHSoD2xbE+QkPxCAFlNEevoEH3Sl0sibVcOQVnN" crossorigin="anonymous">
エクスポート、及びダウンロード処理を行うスクリプトを追加します。
// エクスポート
function exportReport(exportType) {
viewer.export(exportType, downloadReport, true, { FileName: "DefaultName" });
}
// 関数uriからレポートを取得します。(コールバック関数)
var downloadReport = function (uri) {
var newWin = null;
// uriを新しいウィンドウで開きます。
try {
newWin = window.open(uri);
} catch (e) { }
// uriを新しいウィンドウで開けない場合は、現在のウィンドウで開きます。
if (!newWin) {
window.location = uri;
}
};
最後にHTML5ビューワとボタンの定義を以下のように書き換え、エクスポートのボタンを追加します。その際、各ボタンの色も出力対象のアプリケーションにあわせて変更しています。また、ついでにツールバー部分と帳票の表示部分の境界がわかるようにボーダーも追加してみます。
<div style="margin:10px">
<div class="btn-group btn-group-sm">
<button class="btn btn-default" onclick="firstPage()" title="先頭ページ">
<i class="glyphicon glyphicon-step-backward" style="font-size:17.5px" /></i>
</button>
<button class="btn btn-default" id="prevPage" onclick="prevPage()" title="前ページ">
<i class="glyphicon icon-large glyphicon-chevron-left" style="font-size:17.5px" /></i>
</button>
<div class="navbar-left input-group">
<input class="form-control" type="text" id="currentPage" style="font-size:20px" readonly /></i>
</div>
<button class="btn btn-default" id="nextPage" onclick="nextPage()" title="次ページ">
<i class="glyphicon icon-large glyphicon-chevron-right" style="font-size:17.5px" /></i>
</button>
<button class="btn btn-default" onclick="lastPage()" title="最終ページ">
<i class="glyphicon icon-large glyphicon-step-forward" style="font-size:17.5px"></i>
</button>
</div>
<div class="btn-group btn-group-sm">
<button class="btn btn-default" onclick="print()" title="印刷">
<i class="glyphicon glyphicon-print" style="font-size:17.5px"></i>
</button>
</div>
<div class="btn-group btn-group-sm">
<button class="btn btn-danger" onclick="exportReport('Pdf')" title="PDFに出力">
<i class="fa fa-file-pdf-o" aria-hidden="true" style="font-size:17.5px"></i>
</button>
<button class="btn btn-success" onclick="exportReport('Xls')" title="Excelに出力">
<i class="fa fa-file-excel-o" aria-hidden="true" style="font-size:17.5px"></i>
</button>
<button class="btn btn-primary" onclick="exportReport('Word')" title="Wordに出力">
<i class="fa fa-file-word-o" aria-hidden="true" style="font-size:17.5px"></i>
</button>
</div>
<div id="viewer" style="width: 1200px; height: 900px; margin-top: 10px; border: solid #D8D8D8; border-radius: 10px"></div>
</div>
実行すると以下のようにカスタマイズしたエクスポートのボタンが表示できます。
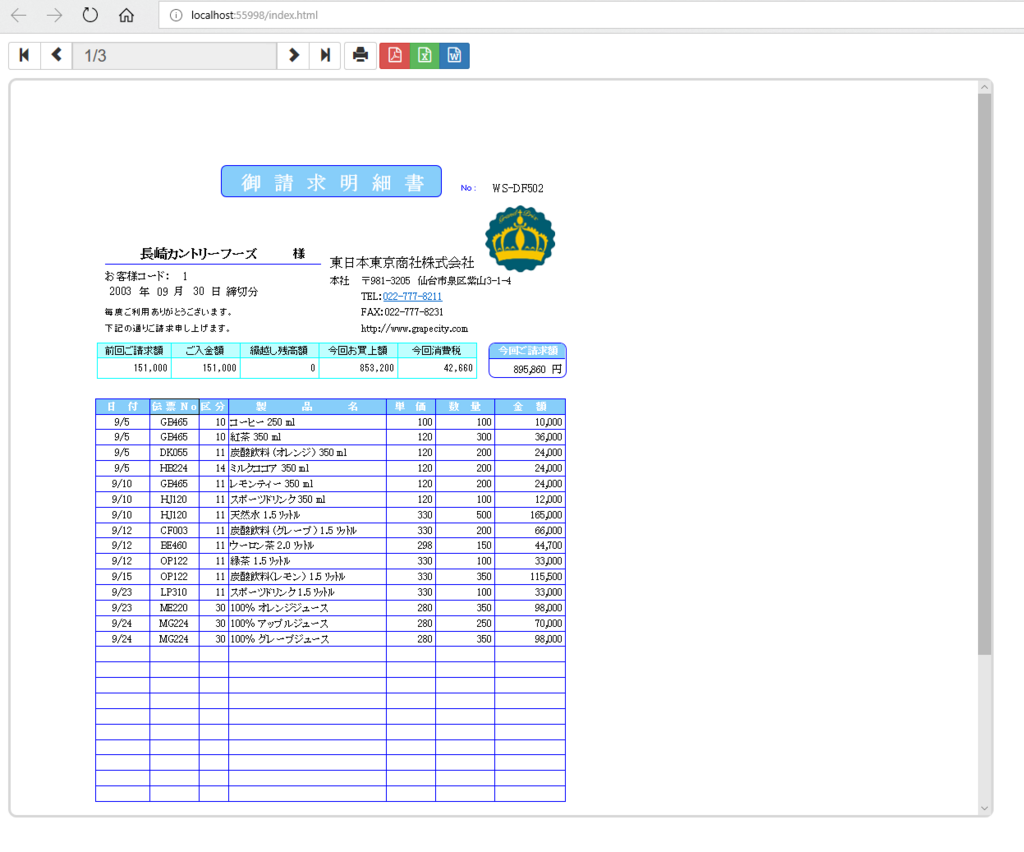
HTML5ビューワのツールバーのカスタマイズはAPIで指定するだけ、というわけにはいかないので結構面倒ですね。この件は開発部門にもすでに報告済みなので、今後のアップデートで簡単にカスタマイズできる機能が提供されることにご期待ください。
グレープシティの開発ツールはお客様の要望をもとに日々改善を検討しています。ActiveReportsを使用していて、こんな機能がほしい、この機能が使いづらいので改善してほしい、などの要望がありましたら是非弊社テクニカルサポートまでご意見をお寄せ頂ければと思います。
